Scheduling Shifts
Generate open shifts, auto-assign drivers, and manually adjust the usage plan schedule.
The schedule tab is the core of a usage plan. Here you generate shift blocks across a date range, assign drivers, and manage day-to-day changes. This page covers shift templates, generation, auto-assignment, manual editing, and conflict handling.
Shift Templates
Before generating shifts, configure your templates in Plan Settings → Shift Templates.
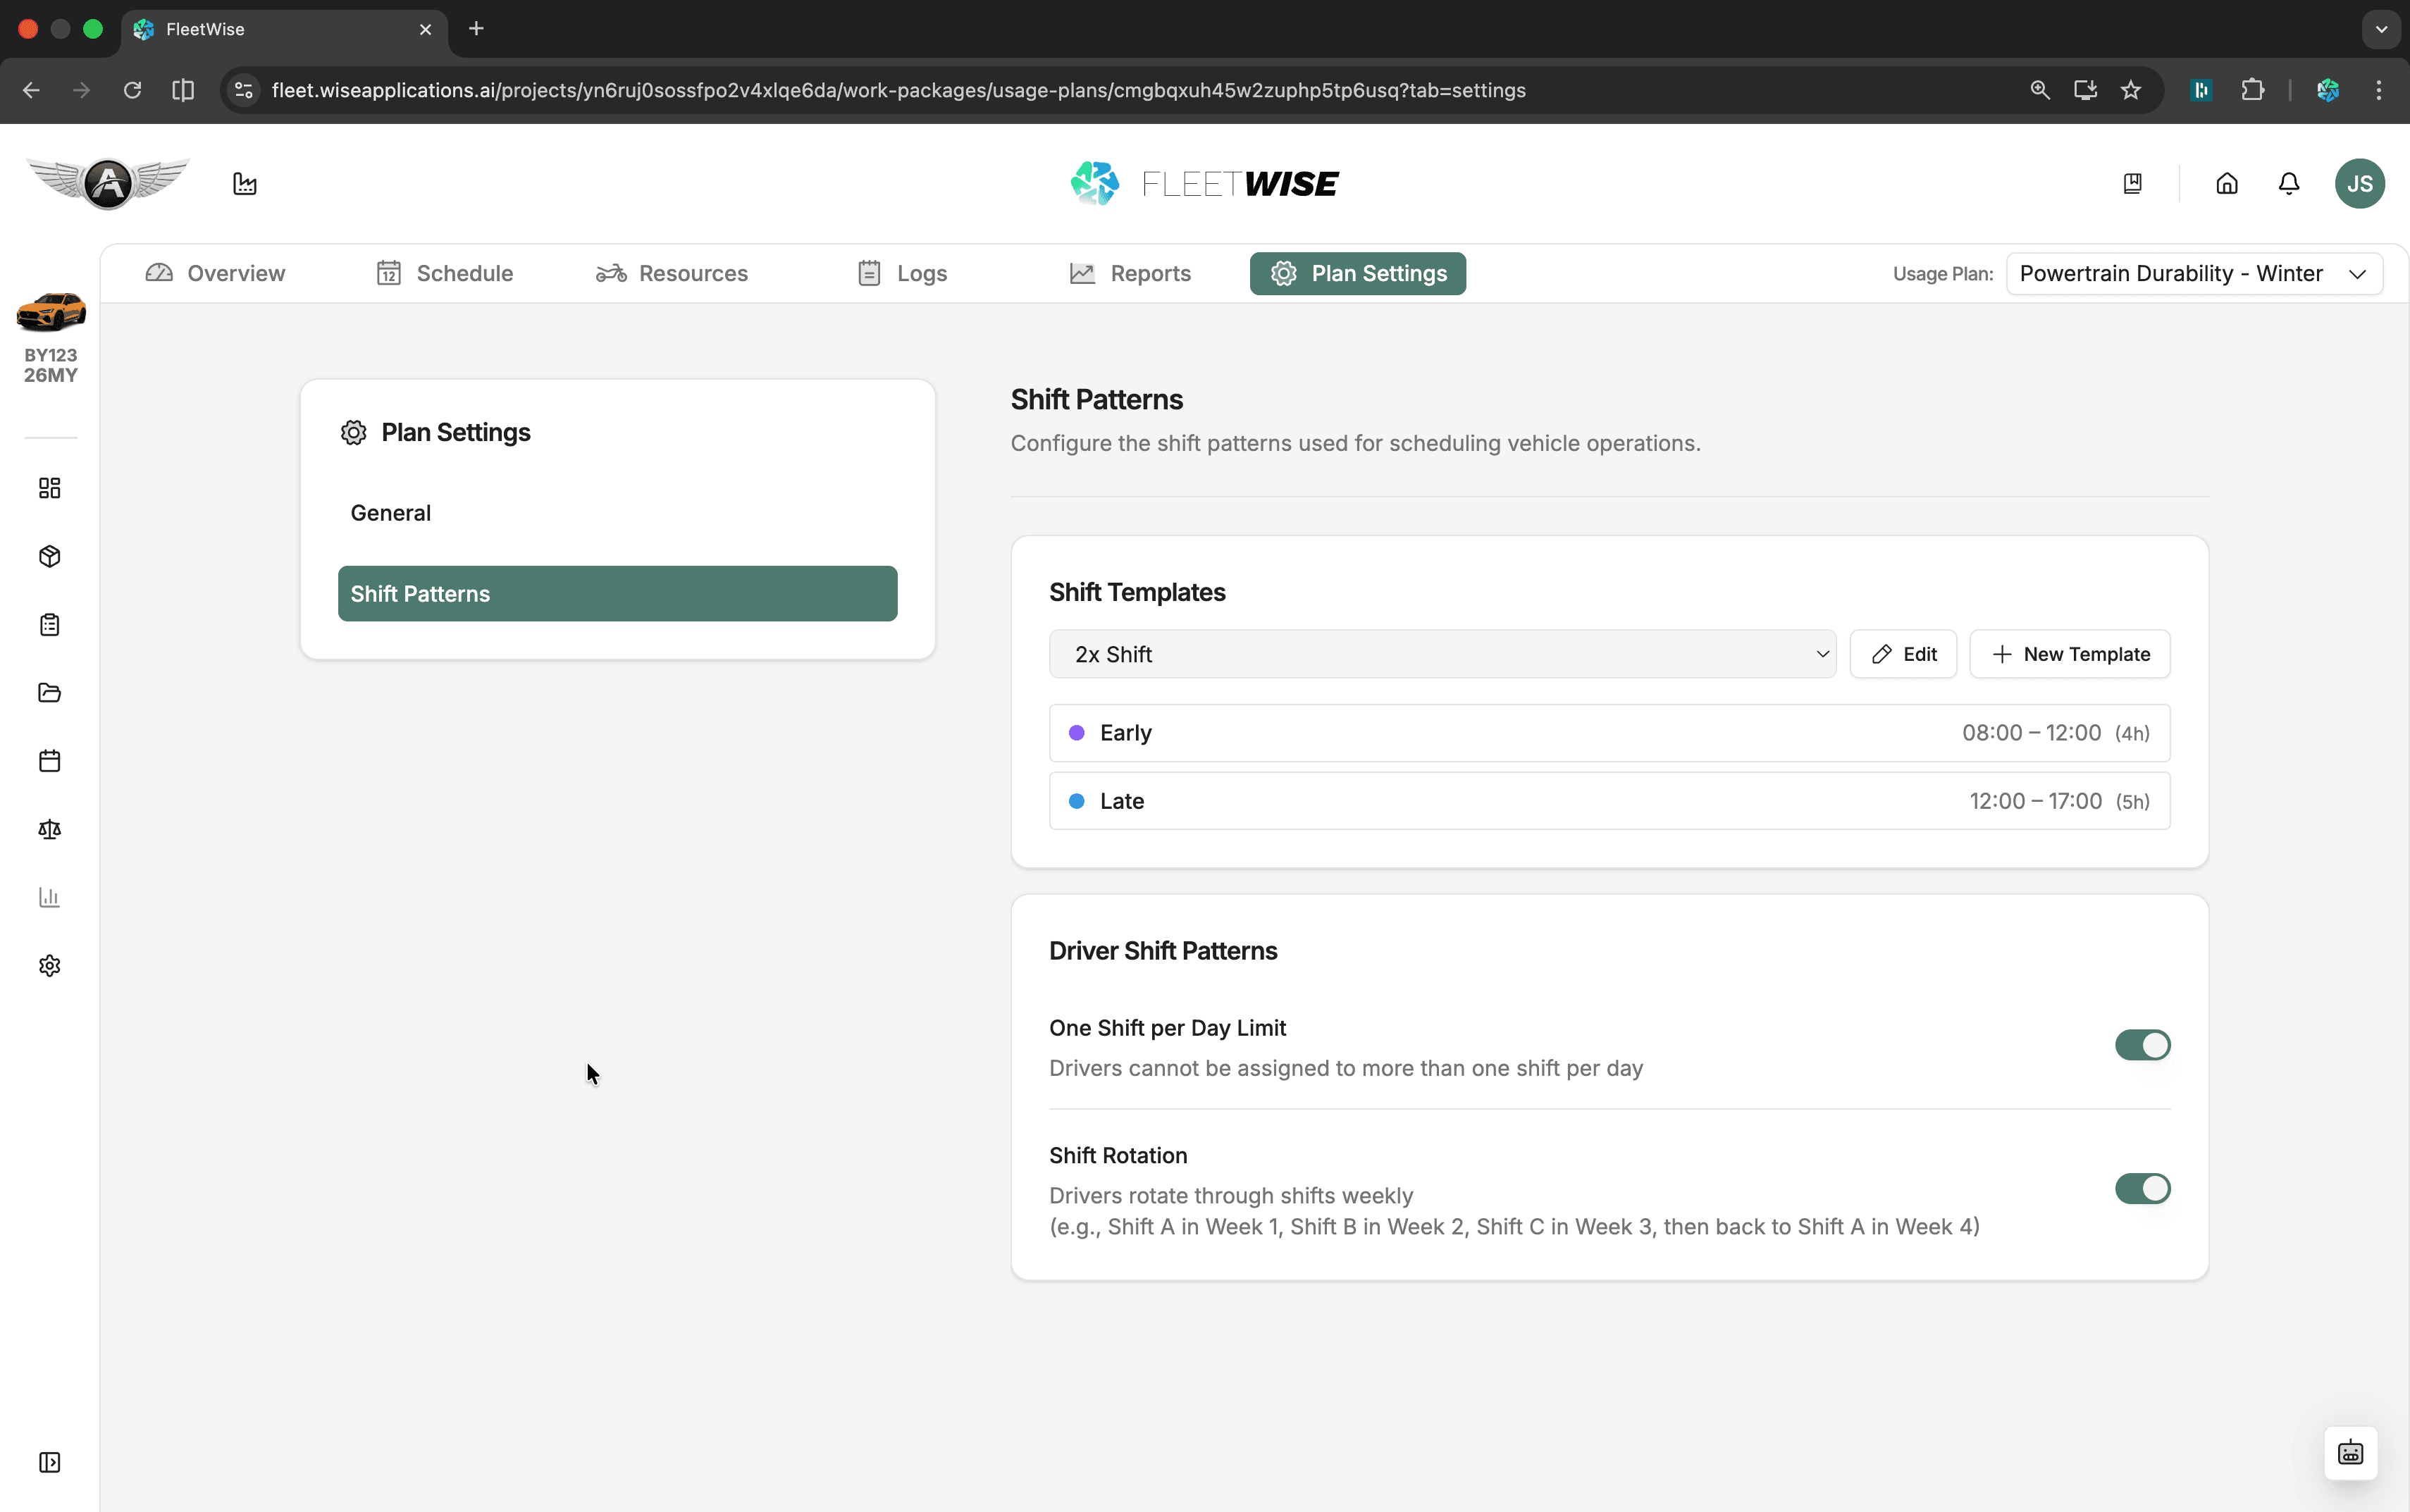
| Setting | Description |
|---|---|
| Preset name | A descriptive name (e.g. "2x Shift - Urban") |
| Shift labels | Name for each shift slot (e.g. "Morning", "Afternoon") |
| Start / End times | Time window for each shift |
| Colour and icon | Visual identifiers on the schedule |
| Driver settings | One-shift-per-day toggle, rotation preference, max hours |
Template Rules
| Rule | Requirement |
|---|---|
| Shifts | At least one shift must exist |
| Labels | Every shift needs a label |
| Times | Shift times must be valid (start before end) |
| Overlap | Shift windows cannot overlap within a preset |
| Names | Preset names must be unique |
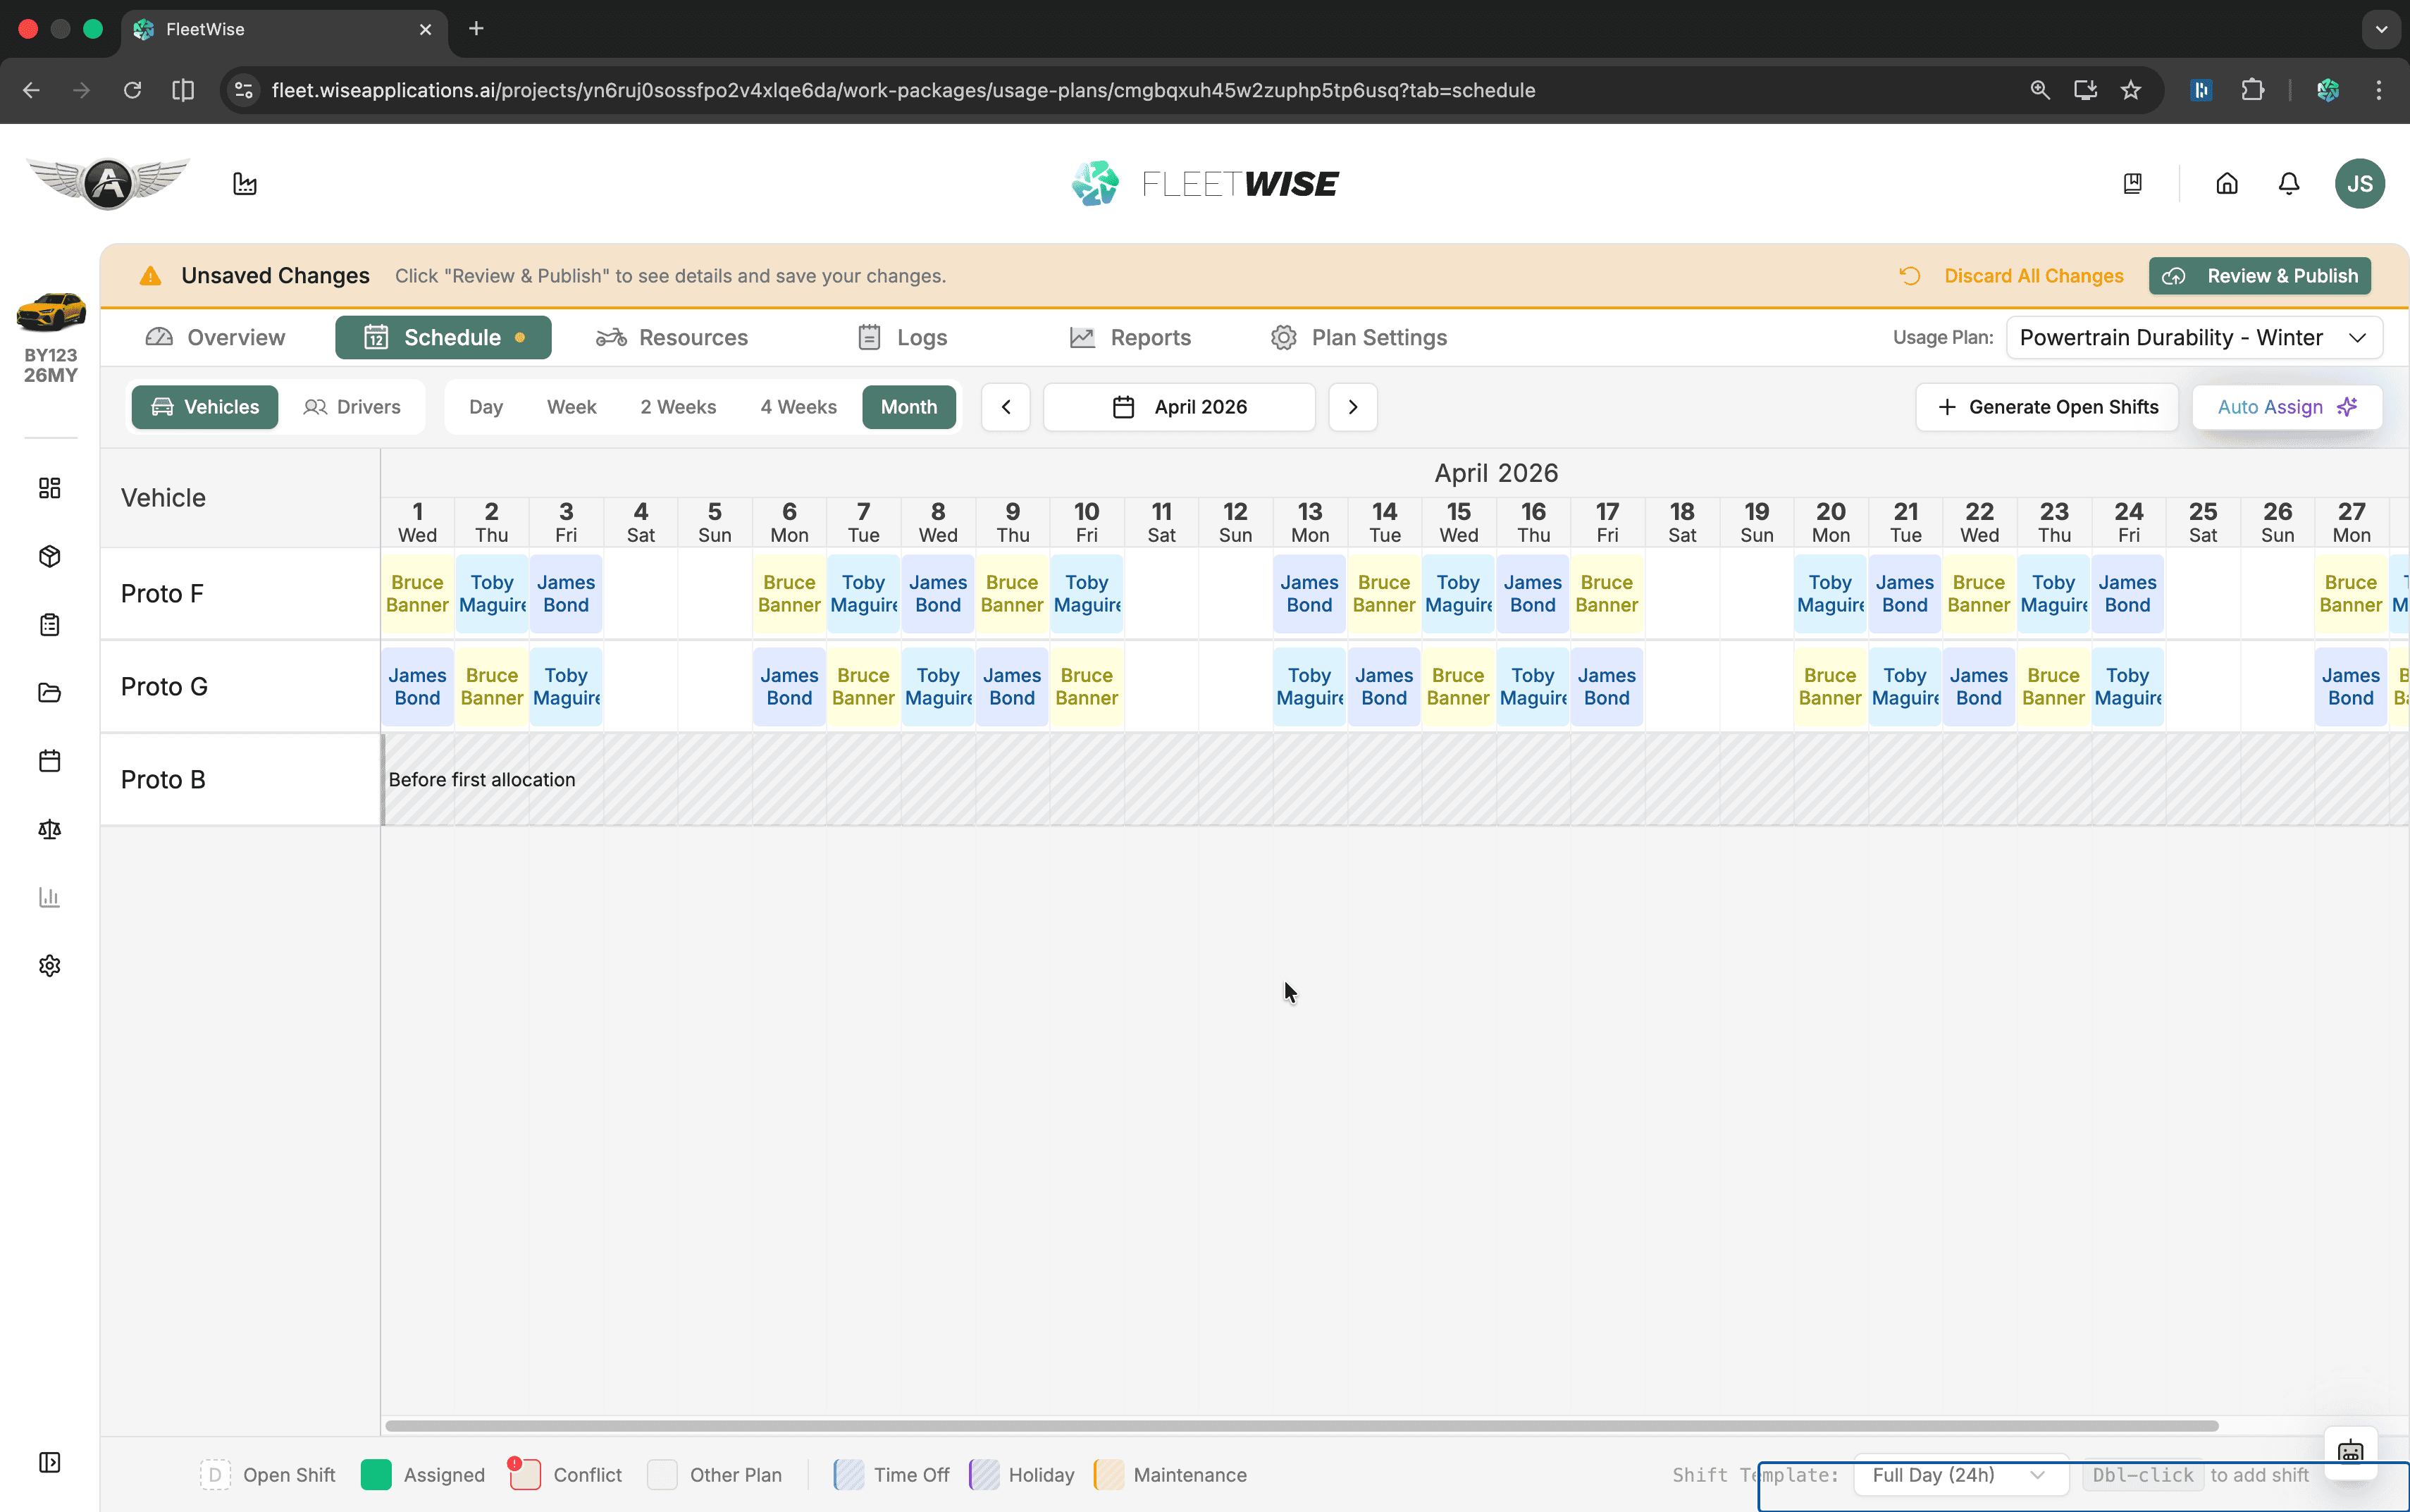
Generating Open Shifts
Open the Schedule Tab
Navigate to the usage plan and select the Schedule tab.
Set the Date Range
Use the date navigation to display the range you want to fill with shifts.
Select a Template
Choose a shift template preset from the dropdown if you have not already set a default.
Click Generate Open Shifts
Click Generate Open Shifts to create empty shift blocks for the visible date range.
Generation Rules
Generation skips dates where shifts already exist (to avoid duplicates), skips unavailable resources, and blocks generation for past-only date ranges.
Assigning Drivers
Auto-Assign
Click Auto Assign to let Fleetwise fill open shifts automatically. The engine considers:
- Driver availability and day-off overrides
- One-shift-per-day setting (if enabled)
- Shift rotation preferences
- Occupancy in other work packages
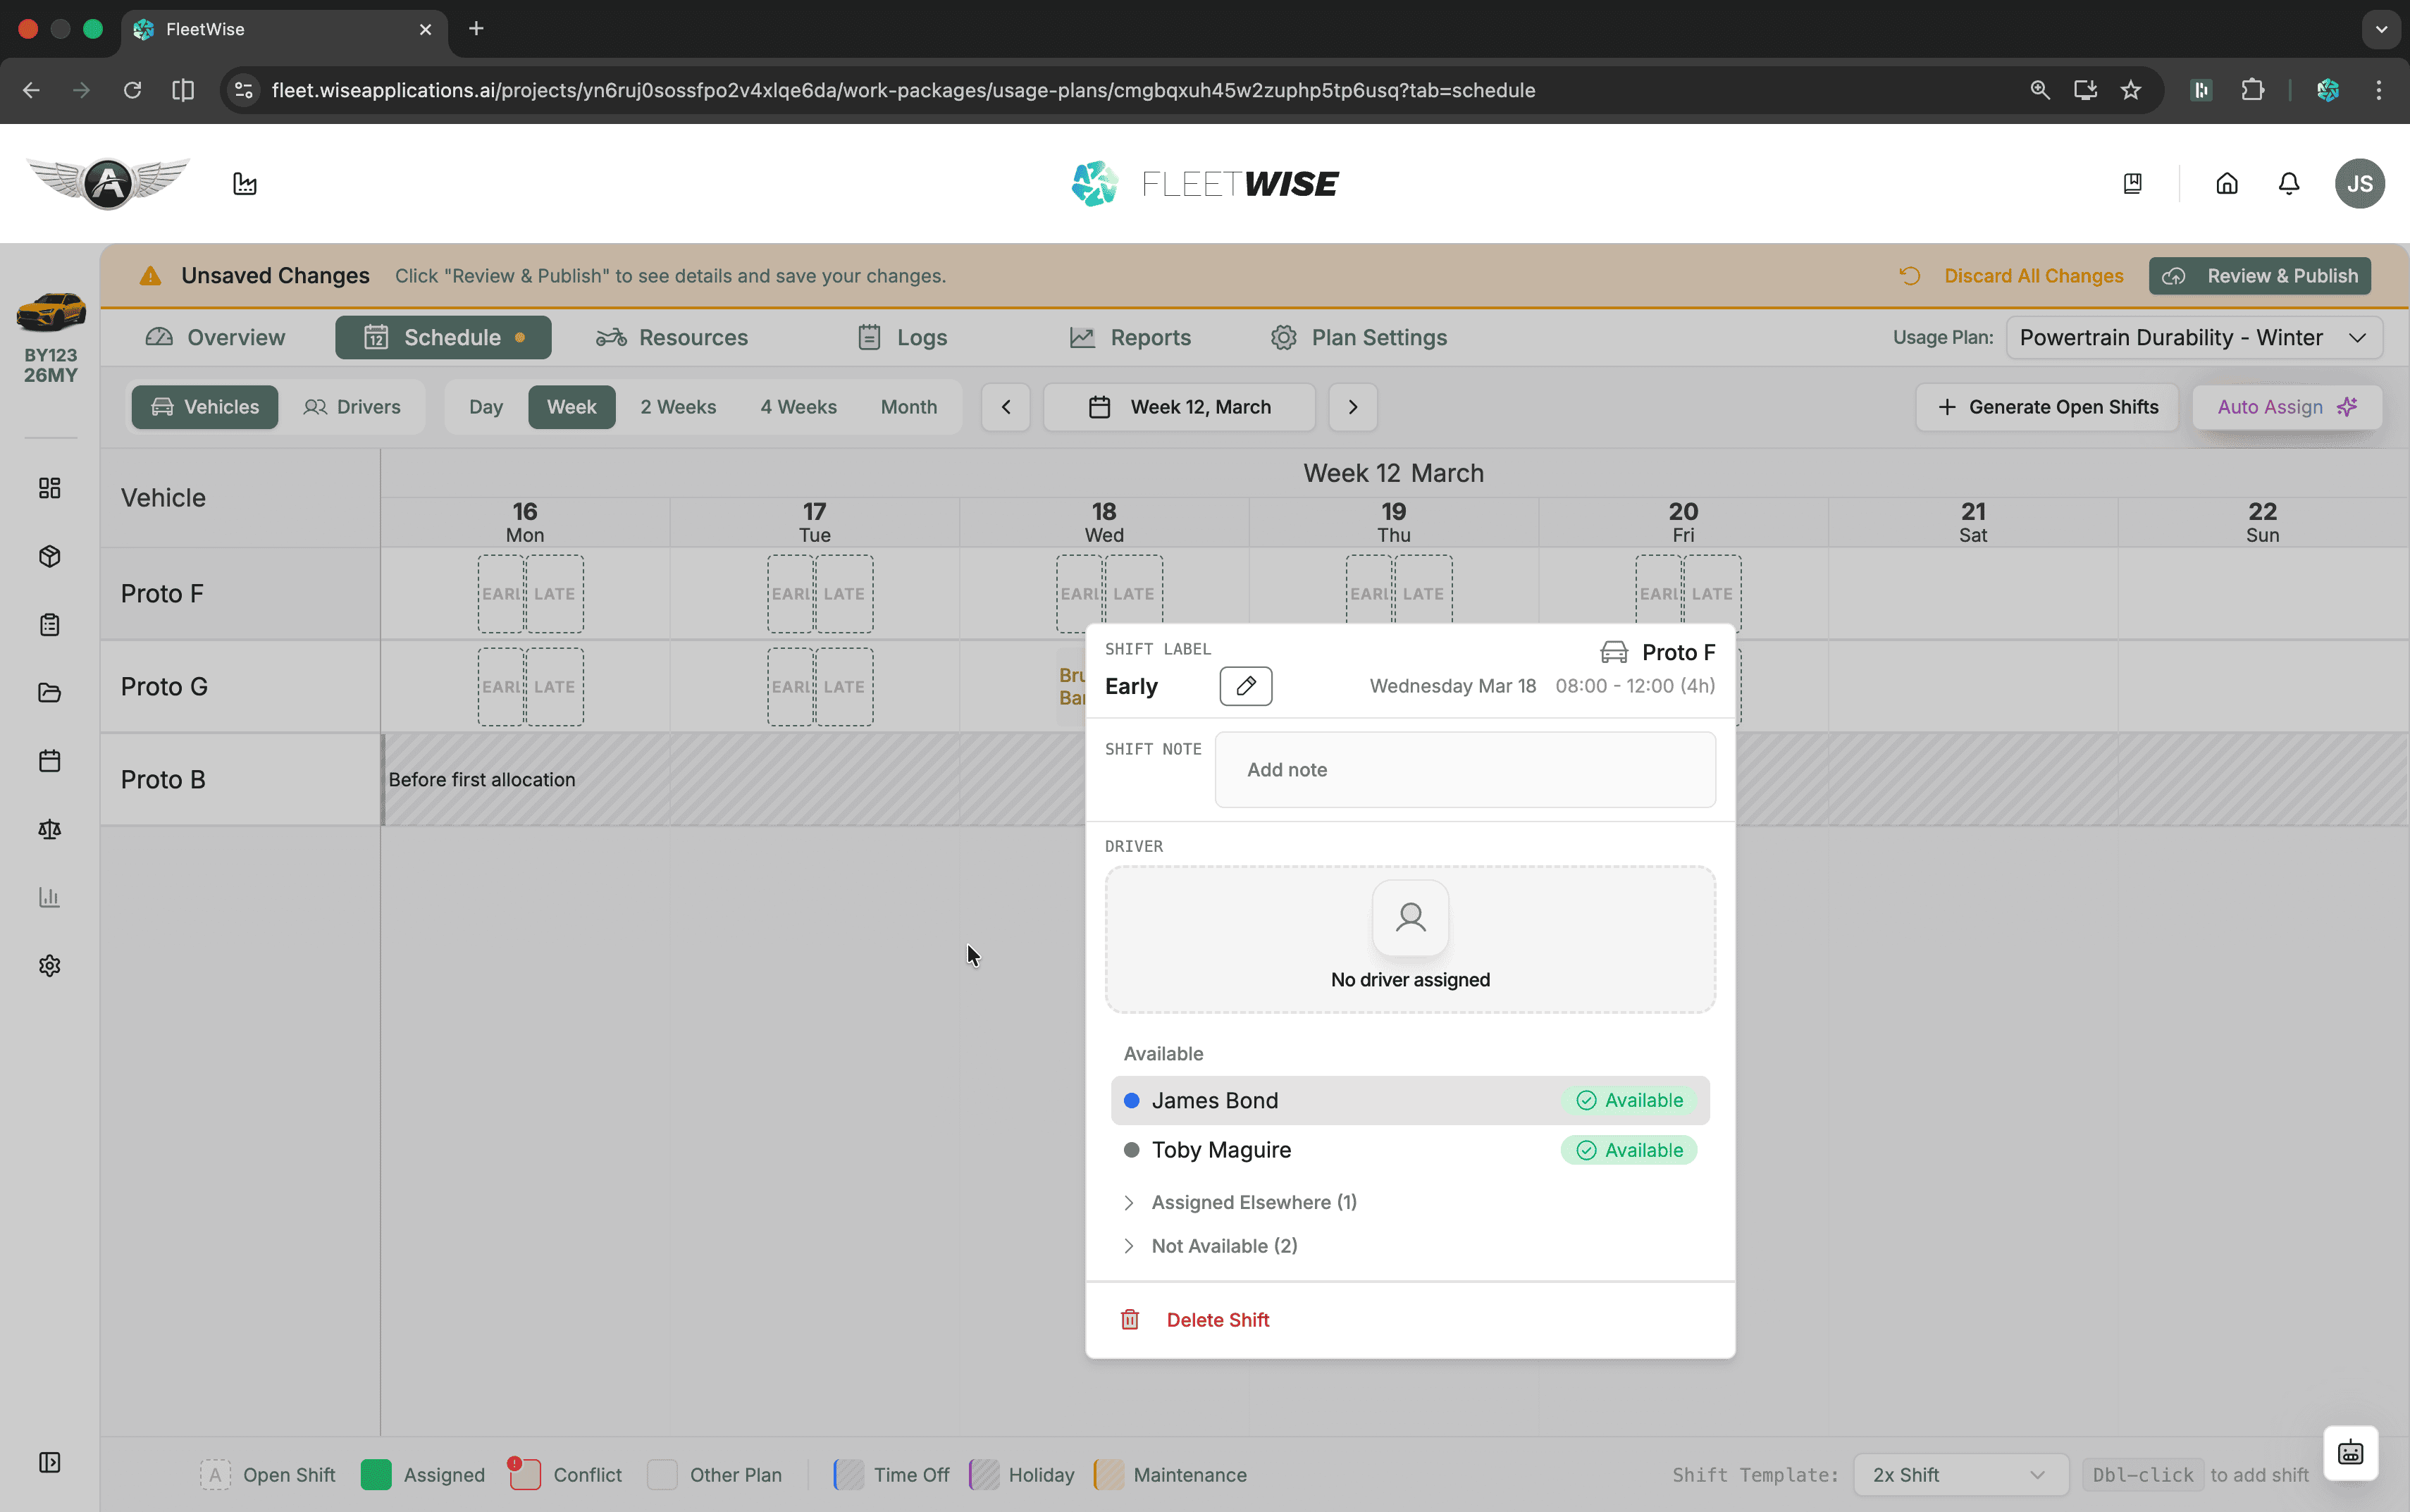
Manual Assignment
- Click an open shift to select a driver from the dropdown.
- Drag a shift event to move it to a different time slot.
- Resize a shift to adjust start and end times.
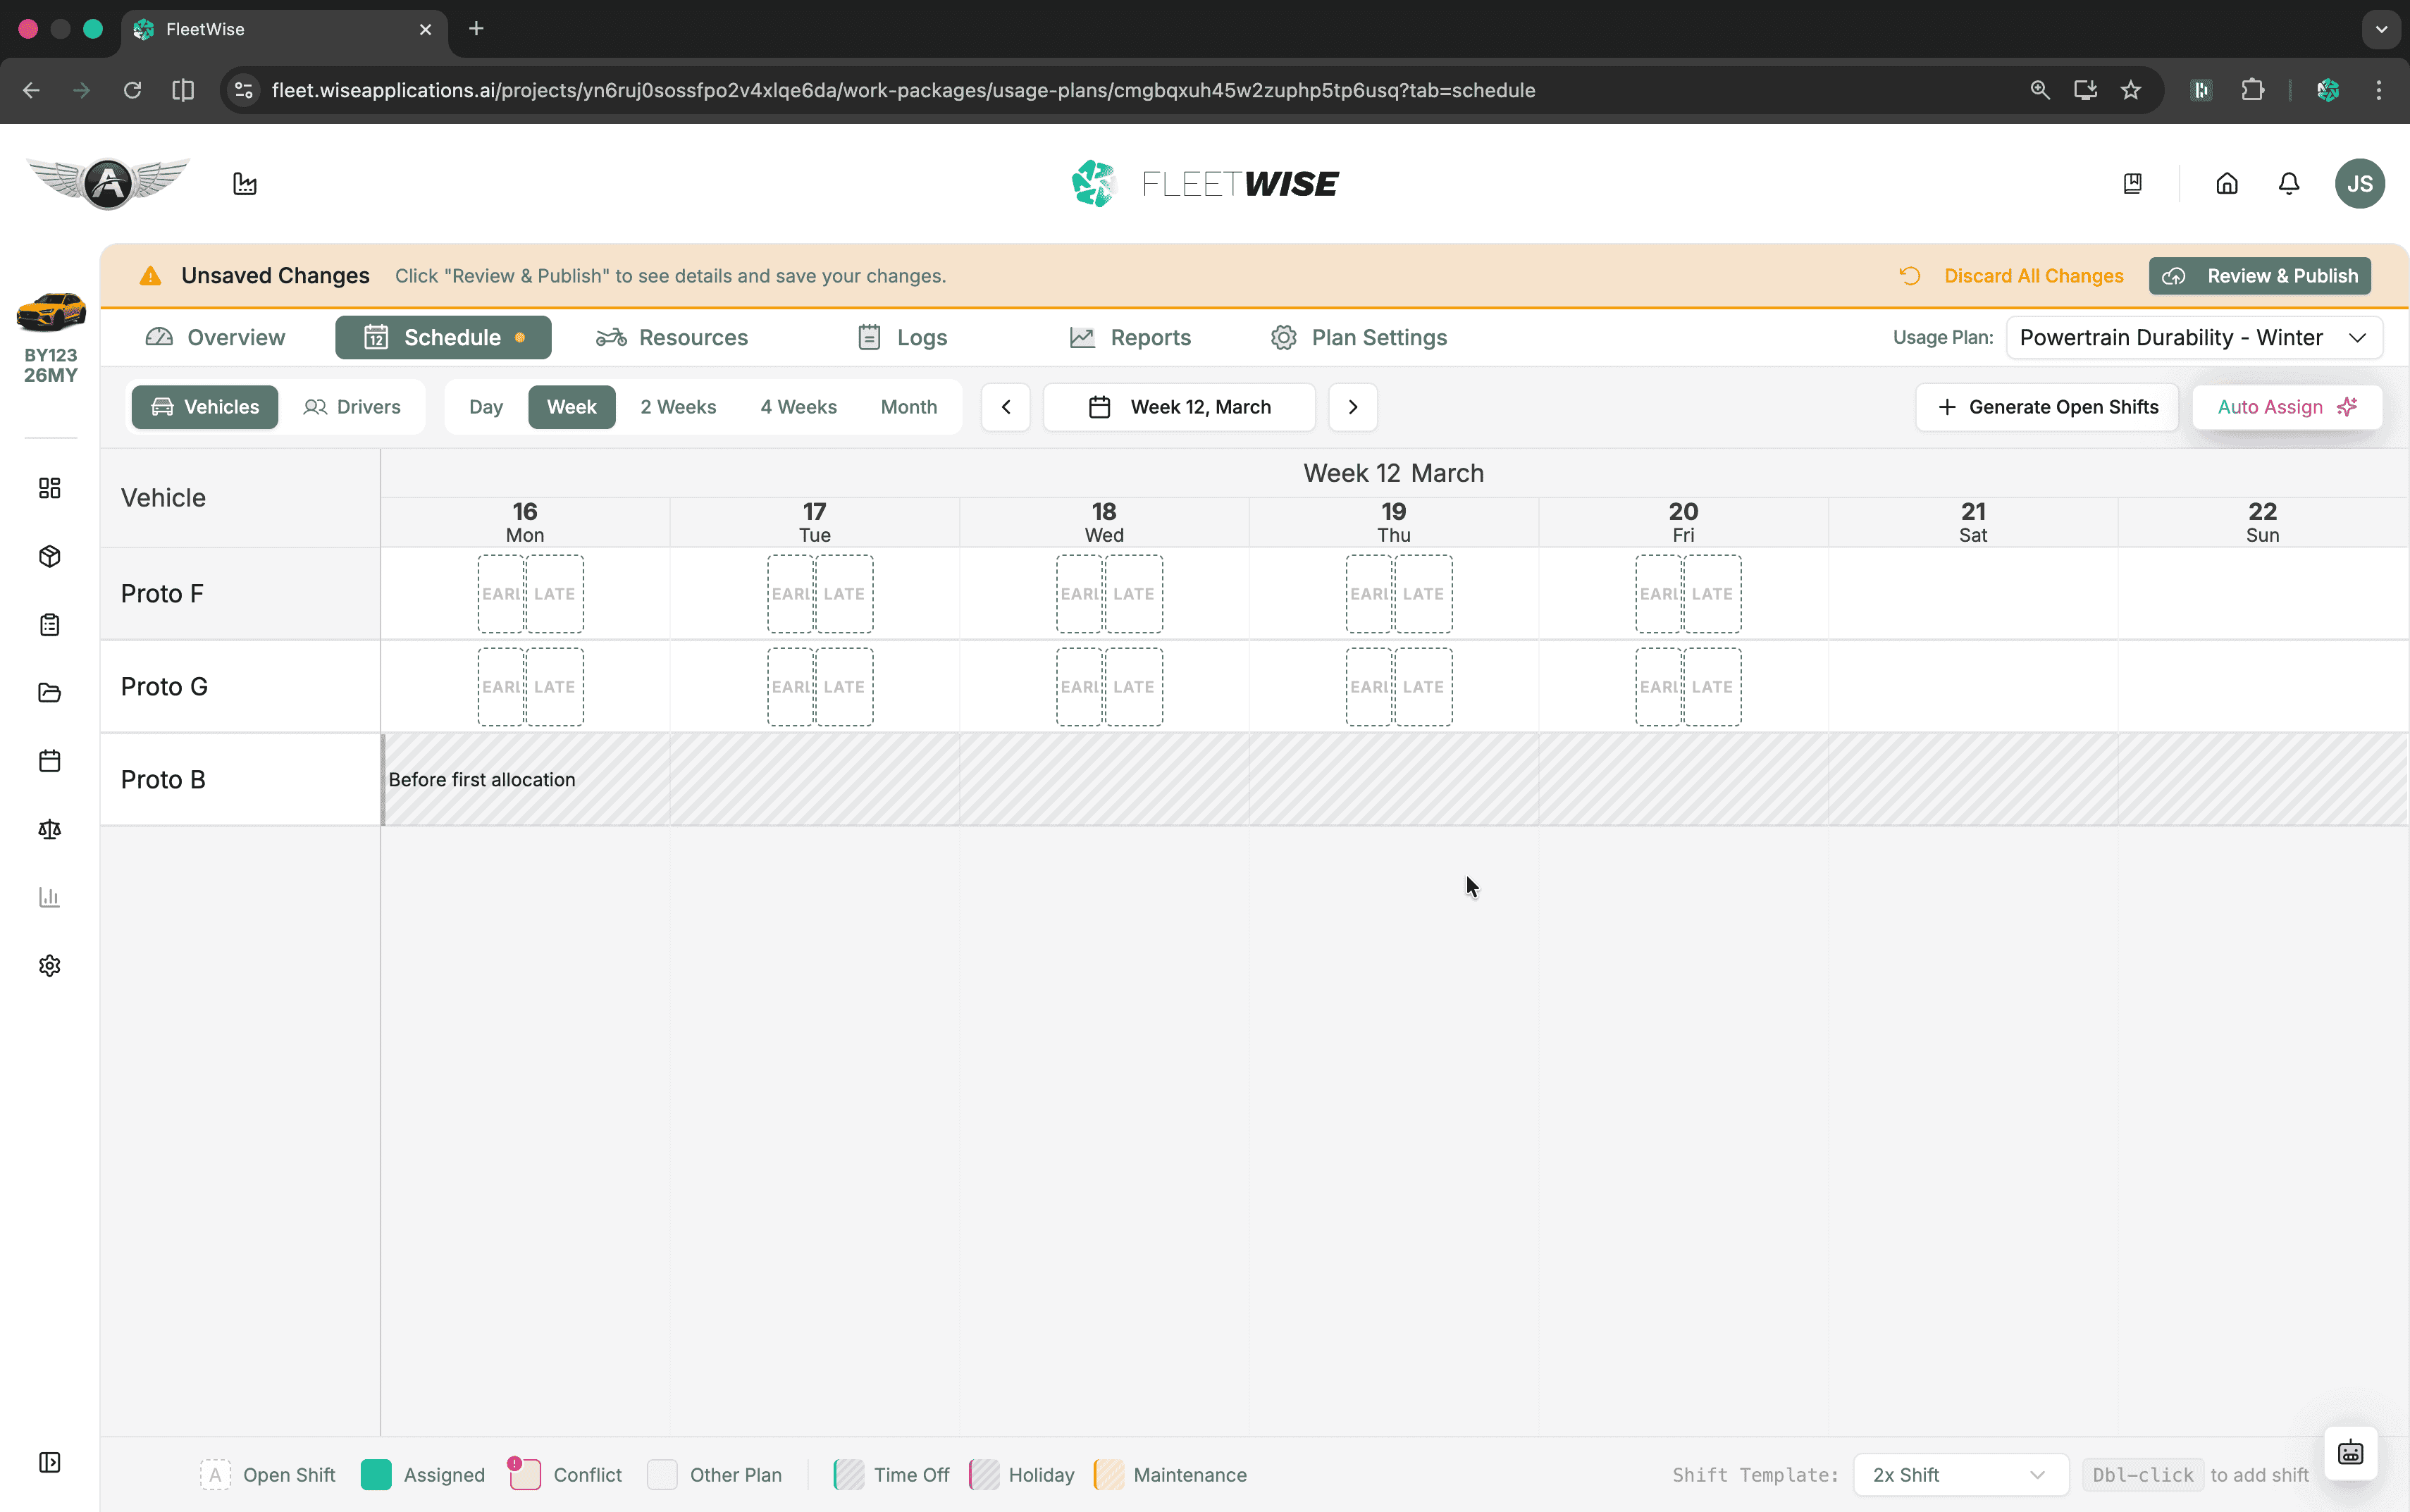
- Double-click an empty cell to add a new shift directly.
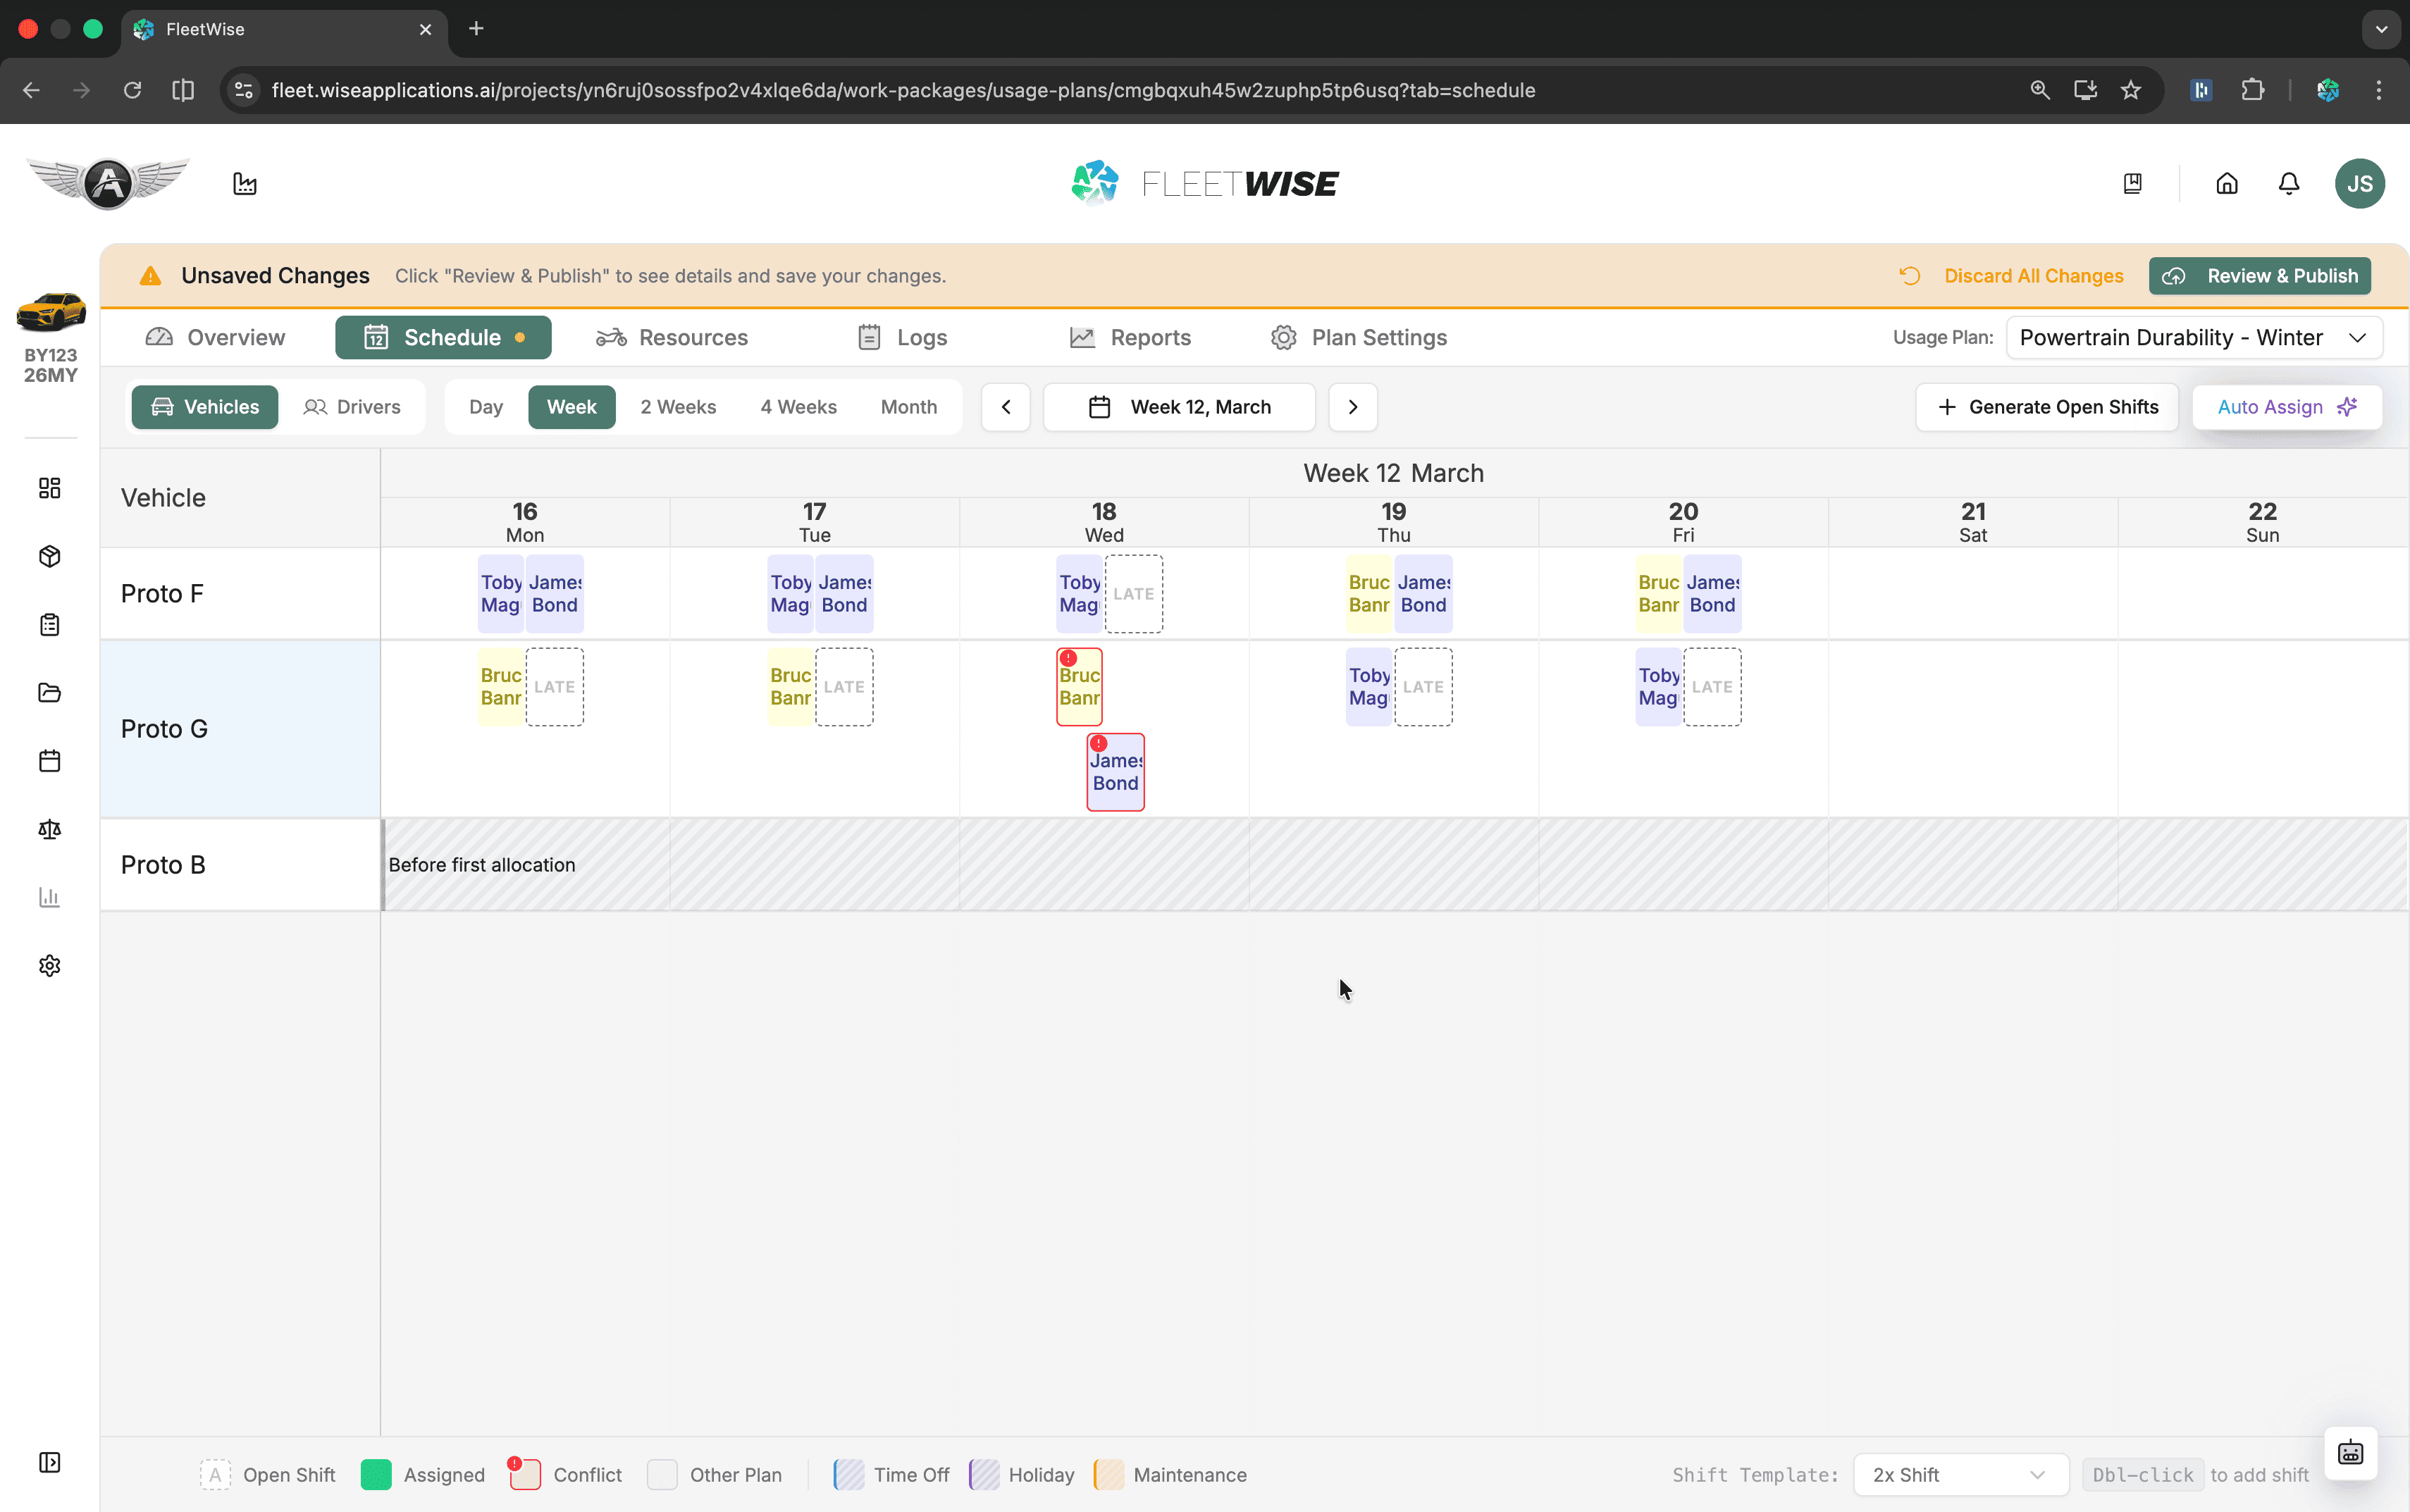
Views
Rows represent vehicles. Use this view when you are planning around
vehicle availability — each row shows all shifts for one vehicle across the
date range.
Rows represent drivers. Use this view when you are balancing driver
workload — each row shows all shifts assigned to one driver. 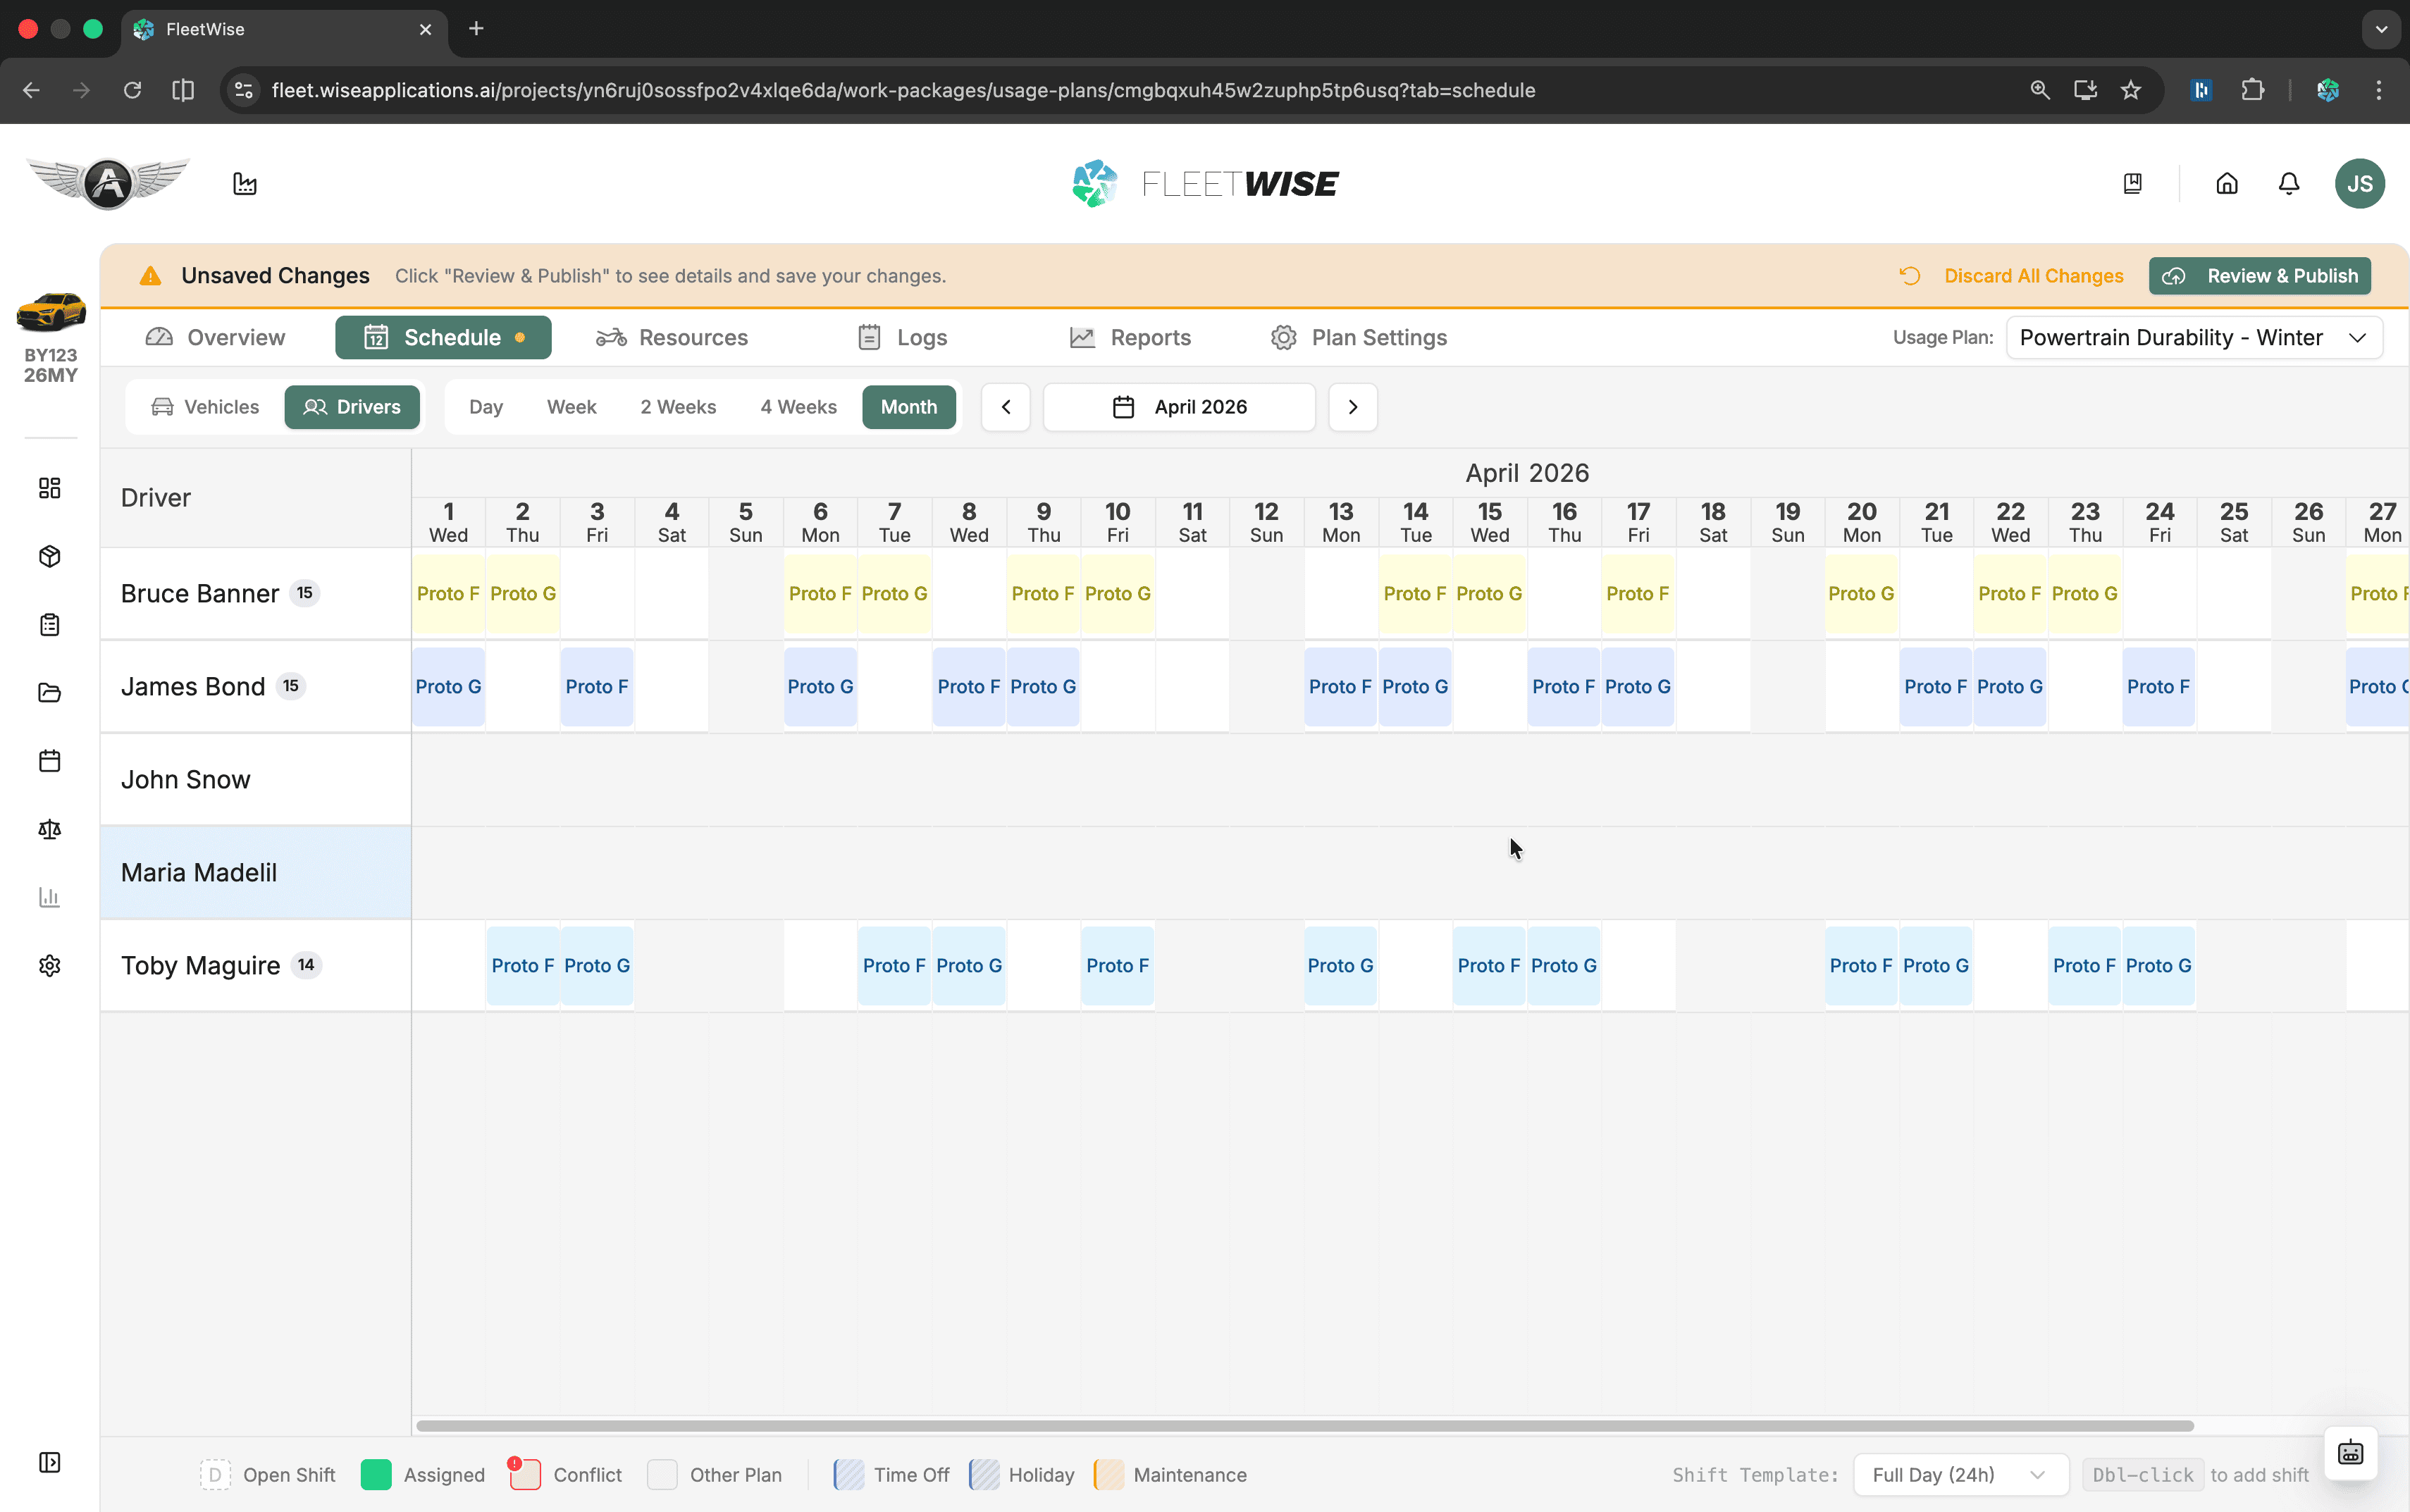
Switch between views using the toggle in the schedule toolbar.
Understanding Conflicts
A conflict means the assigned driver or vehicle is unavailable for that shift.
Driver Unavailable
Day off (vacation, sick leave), shift outside working hours, or already assigned to another shift on the same day.
Vehicle Unavailable
In maintenance, shift outside the work package allocation window, or already booked for overlapping times.
How Conflicts Appear
- Conflicted shifts show a red border.
Saving Conflicted Shifts
Conflicted shifts can still be saved. The Review Changes modal warns you (e.g. "X assignments have conflicts") but does not block publishing. Resolve conflicts when possible but do not let them block your workflow entirely.
Review and Publish
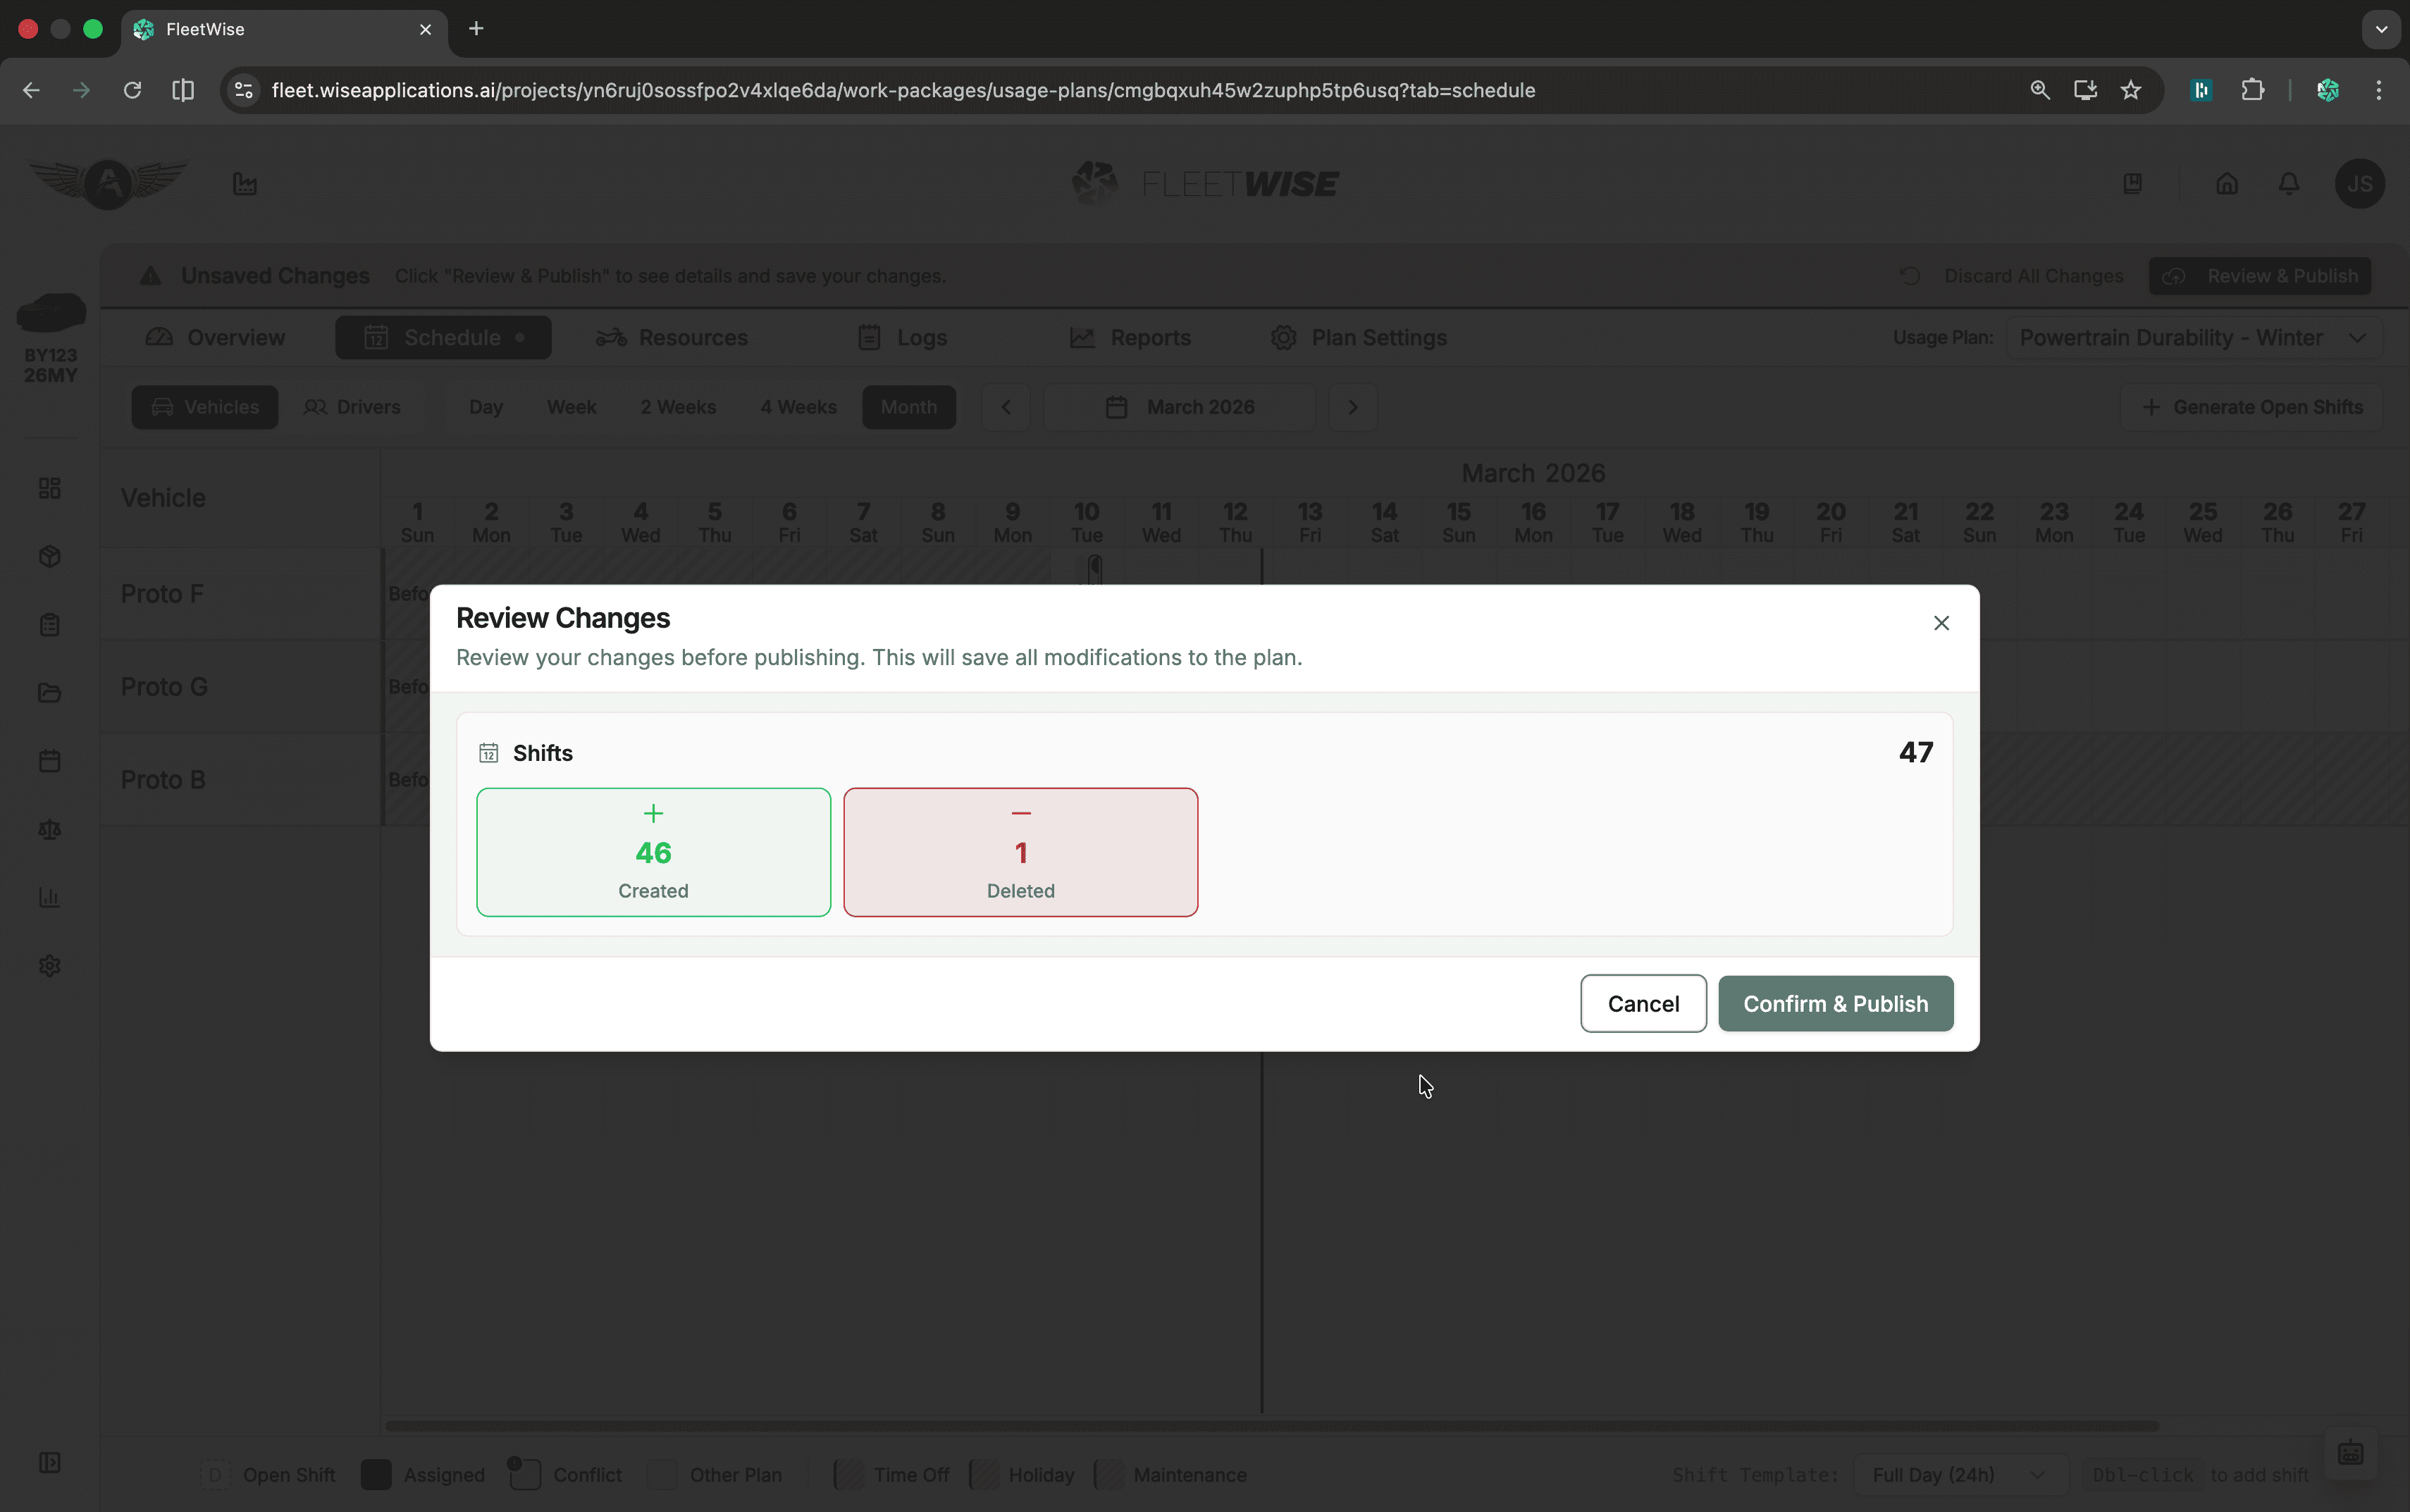
When you have draft changes, click Review Changes to:
- See summary counts (created, deleted, assigned, reassigned).
- Confirm resource selection changes.
- Publish all pending edits.
Unsaved Changes
If you navigate away with unsaved changes, the app warns you before data loss.
Tips
- Keep preset names descriptive and aligned with business intent (e.g. "2x Shift - Urban", "3x Shift - Endurance").
- Publish in small increments rather than very large batches.
- Use Review Changes before every publish to catch unintended edits.
- Check the drivers view periodically to ensure balanced workload distribution.