Managing Users
Invite, remove, and manage user roles and access at the workspace level.
Workspace user management controls who can access Fleetwise and which projects they can see. Workspace Admins handle invitations and role assignments from the workspace users page.
Accessing the Users Page
Navigate to Users in the workspace header navigation.
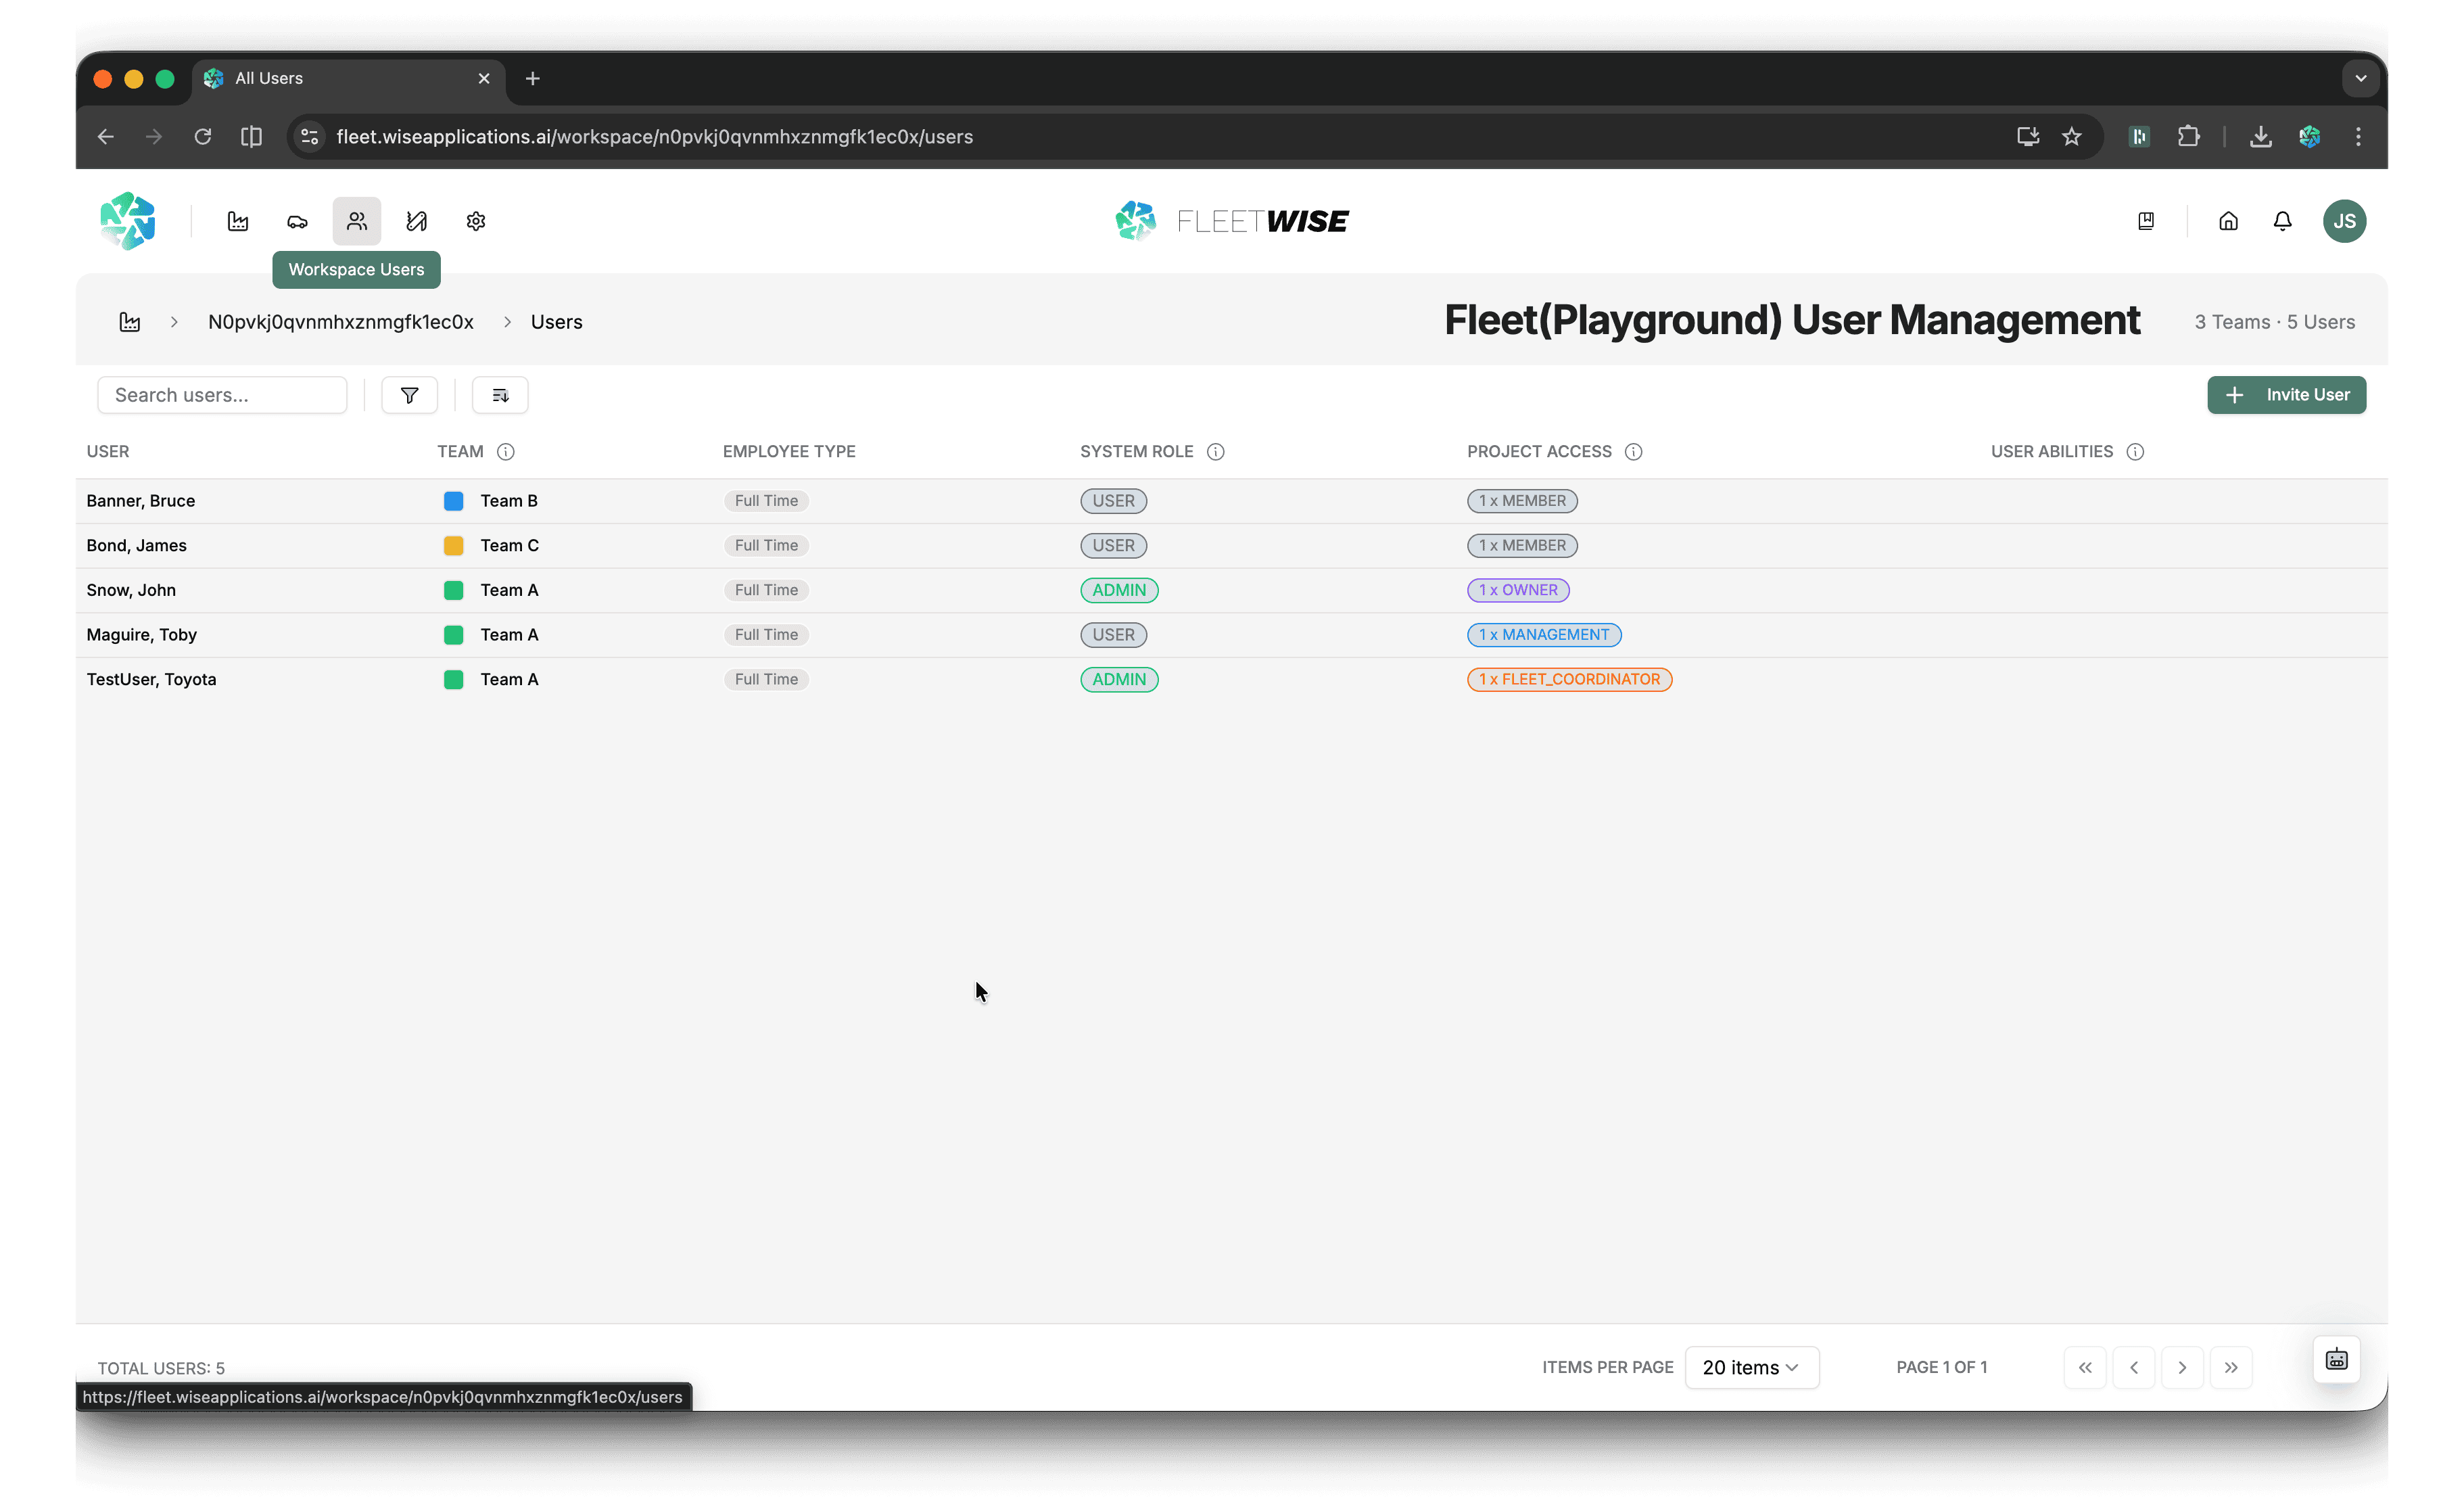
User List
The users page shows all members of the workspace:
| Column | Content |
|---|---|
| User | Display name (last name, first name) |
| Team | Workspace team with a colour indicator |
| Employee Type | Employment category (e.g. Internal, External) |
| System Role | Workspace-level role (Admin or User) |
| Project Access | Number of projects the user belongs to, grouped by project role |
| User Abilities | Assigned abilities such as Test Driver, Technician, or Passout Approver |
Use Search to find users by name or email, and Sort to order by any column.
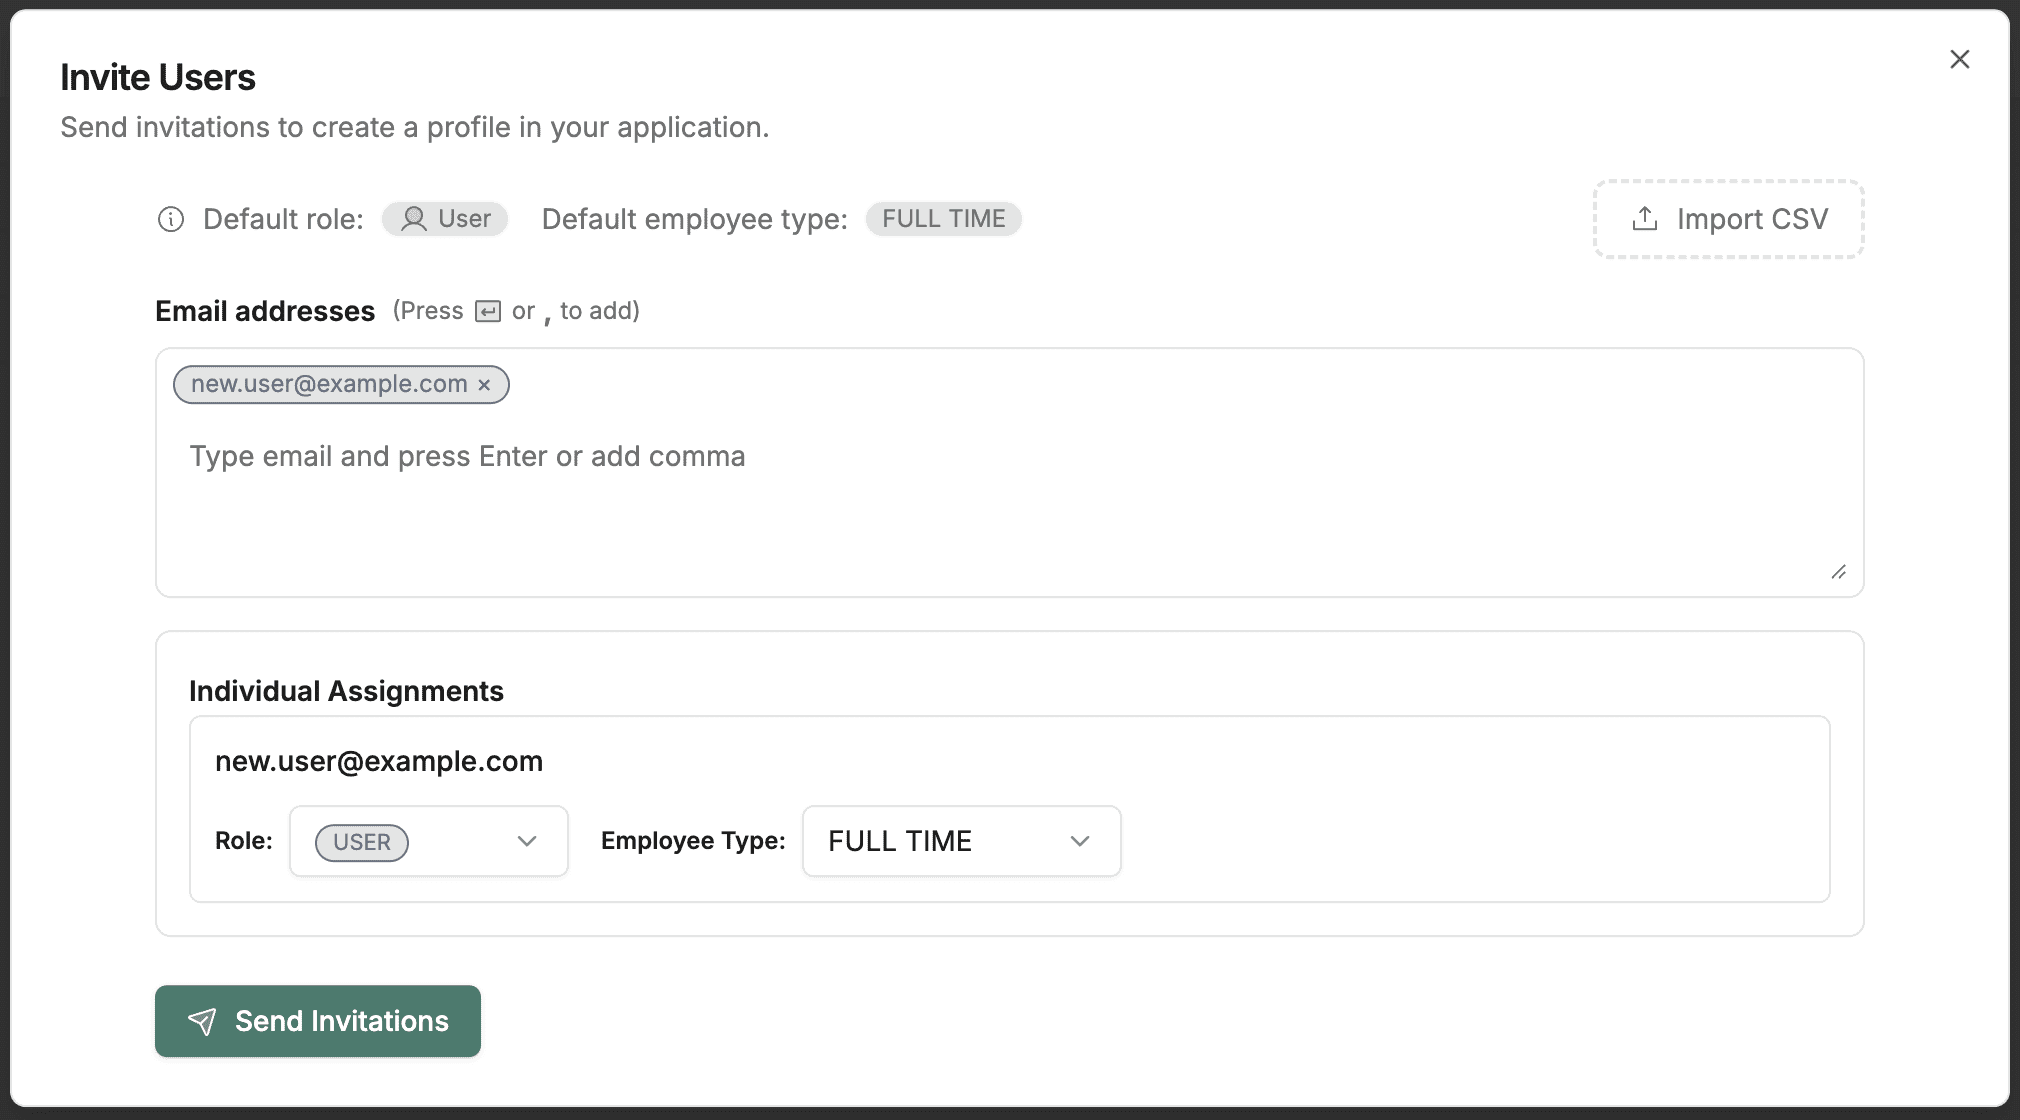
Inviting a User
Click Invite User
Click the Invite User button in the toolbar.
Enter Details
Provide the user's email address and select a workspace role.
Send Invitation
Click Send. The user receives an email with a link to accept the invitation and set up their account.
Invitation Link
The invitation link expires after a set period. If it expires, you can resend the invitation from the users list.
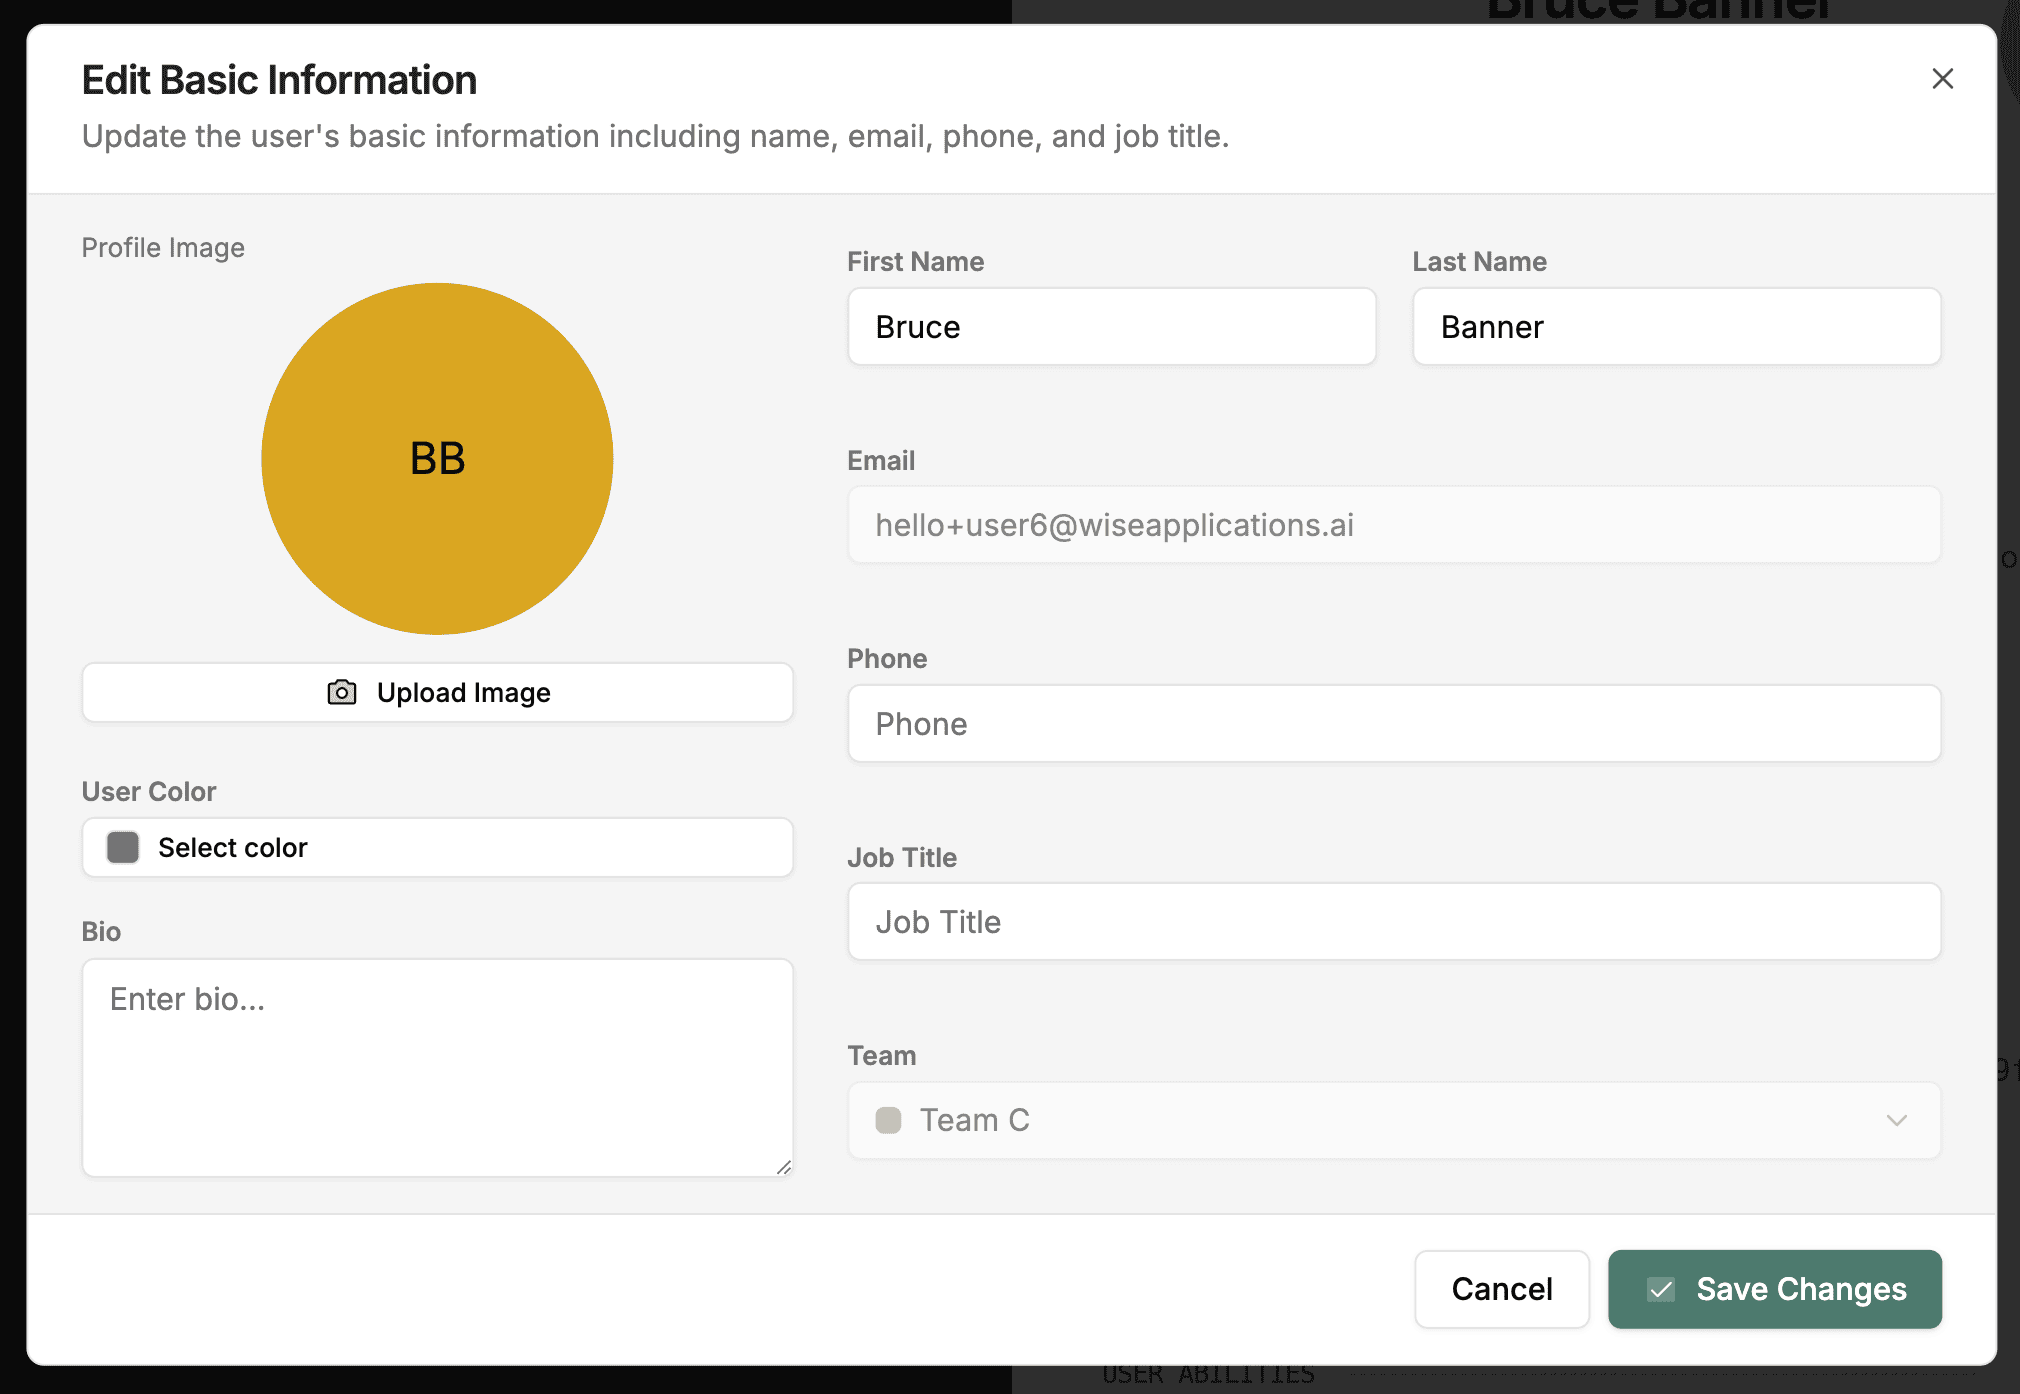
Editing User Information
To update a user's name, email, phone, job title, profile image, user colour, bio, or team assignment, open the Edit Basic Information dialog from the user detail view.
Open the Edit Basic Information dialog
From the user detail view, open the edit dialog to access the basic information form.

Update basic details
Edit the user's first name, last name, email, phone, and job title as needed.
Edit the user's team
Use the Team dropdown to assign the user to a team or change their current team. Select a team from the list to update the assignment.
Save changes
Click Save Changes to apply your updates.
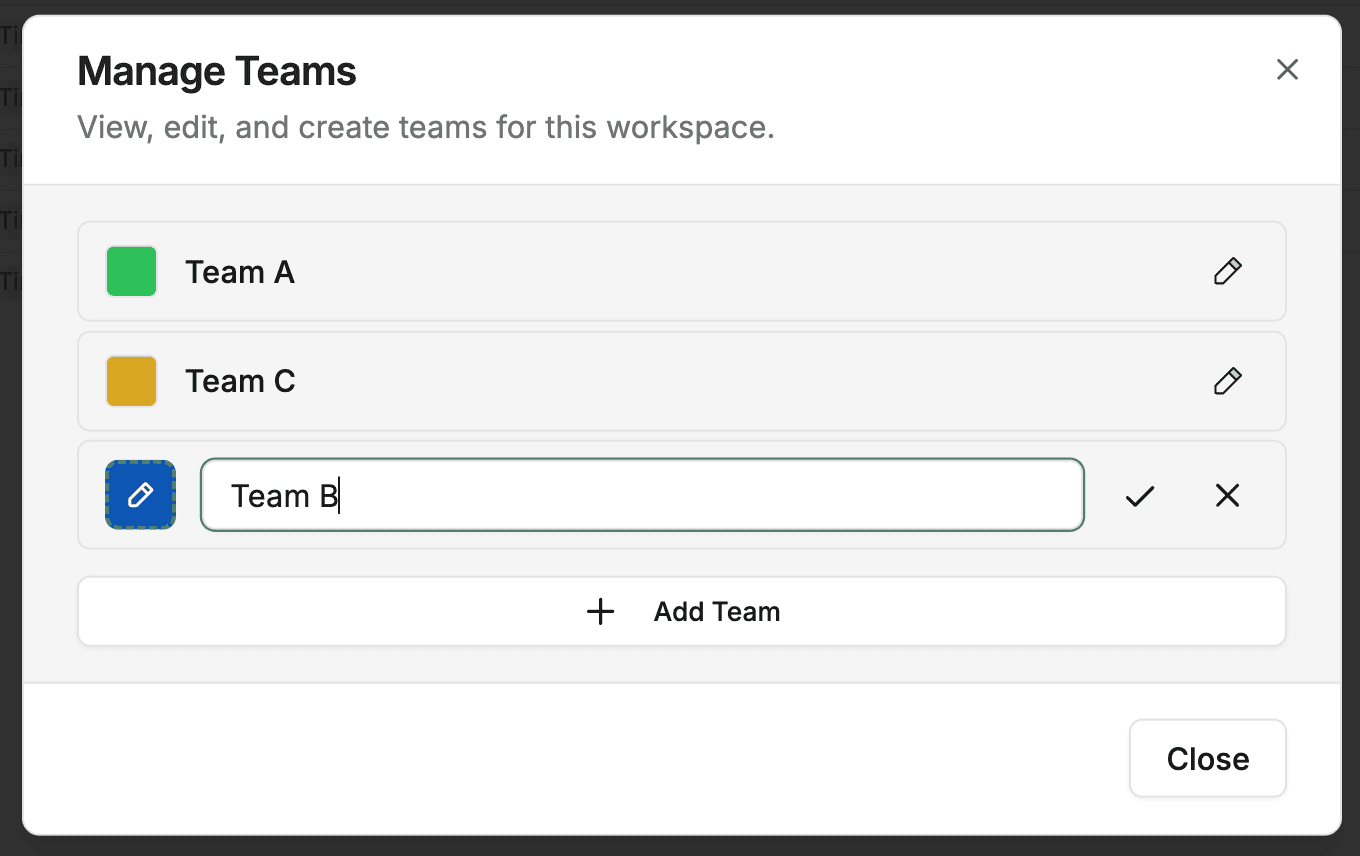
Managing Teams
Teams group workspace users together. Team assignments appear in the user list and are used to colour-code allocations in the schedule view.
Open the Manage Teams dialog
Click Manage Teams in the toolbar on the users page.
View existing teams
The dialog lists all teams in the workspace, each shown with a colour swatch and name.
Edit a team
Click the edit icon next to a team to change its name or colour. Click the colour swatch to open the colour picker, where you can choose a preset colour or enter a custom hex value.
Add a new team
Click Add Team at the bottom of the dialog. Enter a team name, choose a colour, and confirm to create the team.
Managing Roles
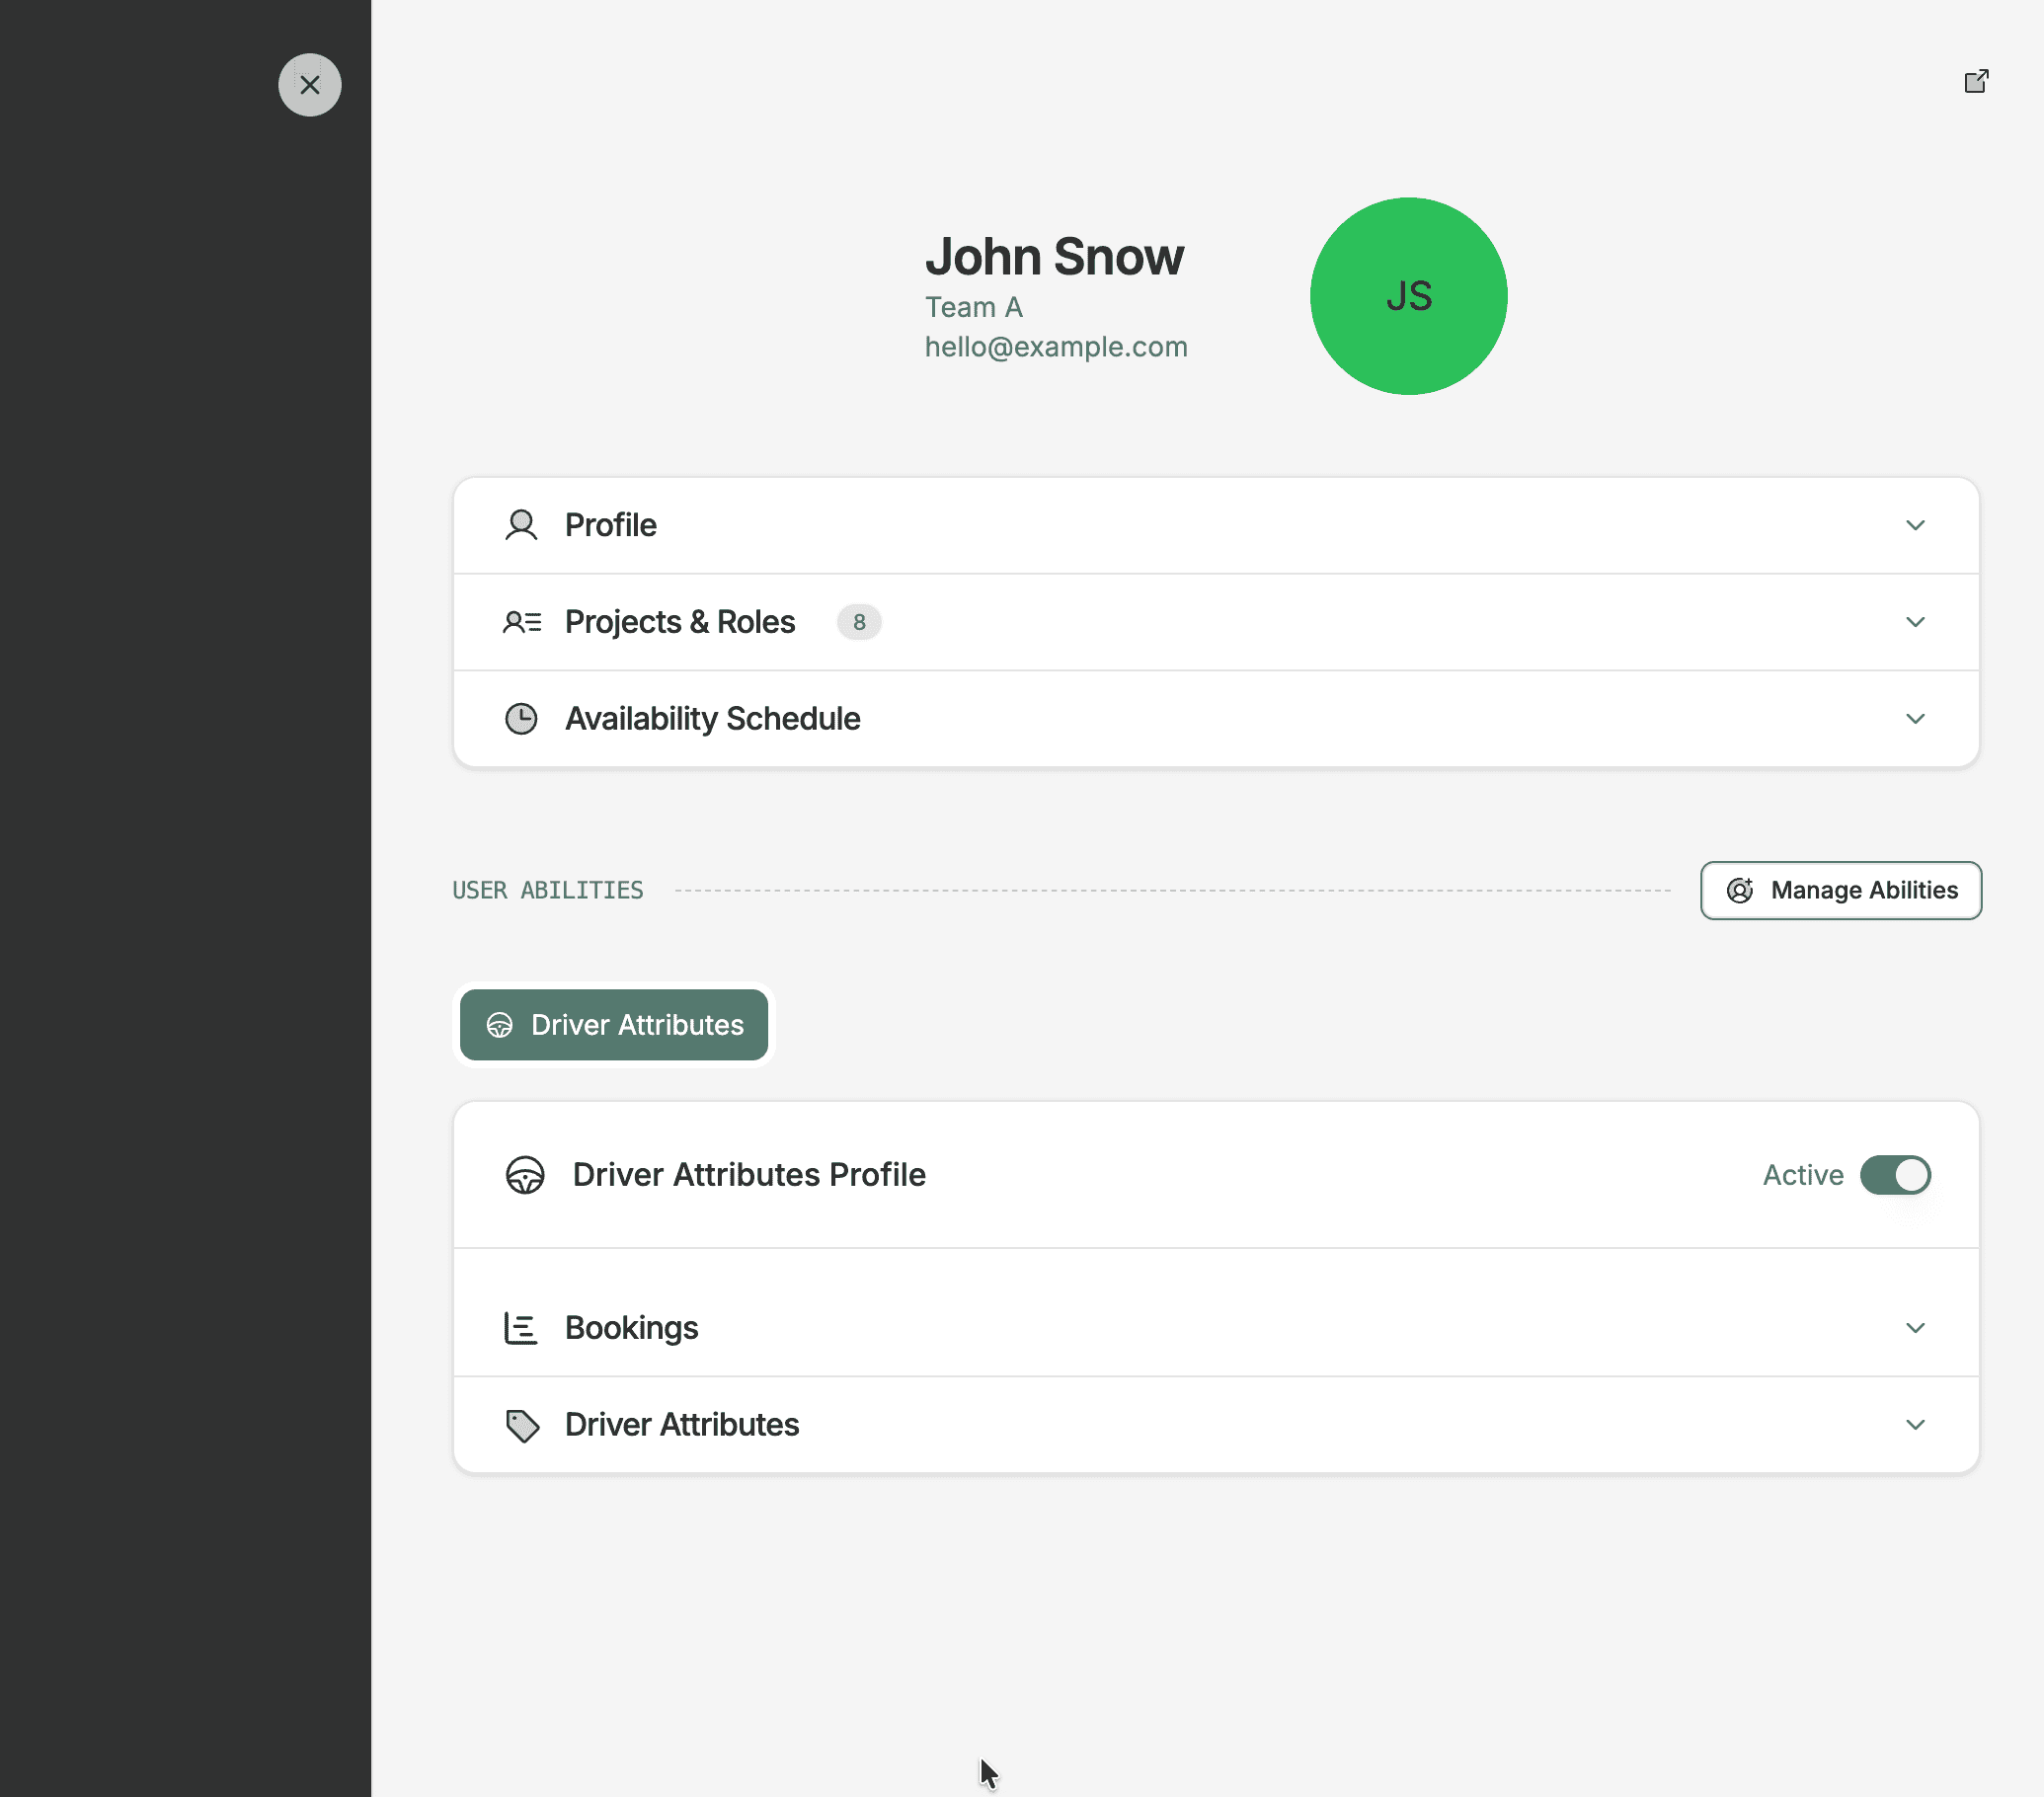
Click a user row to open the user detail view, where you can:
- Change their workspace role (Admin or User).
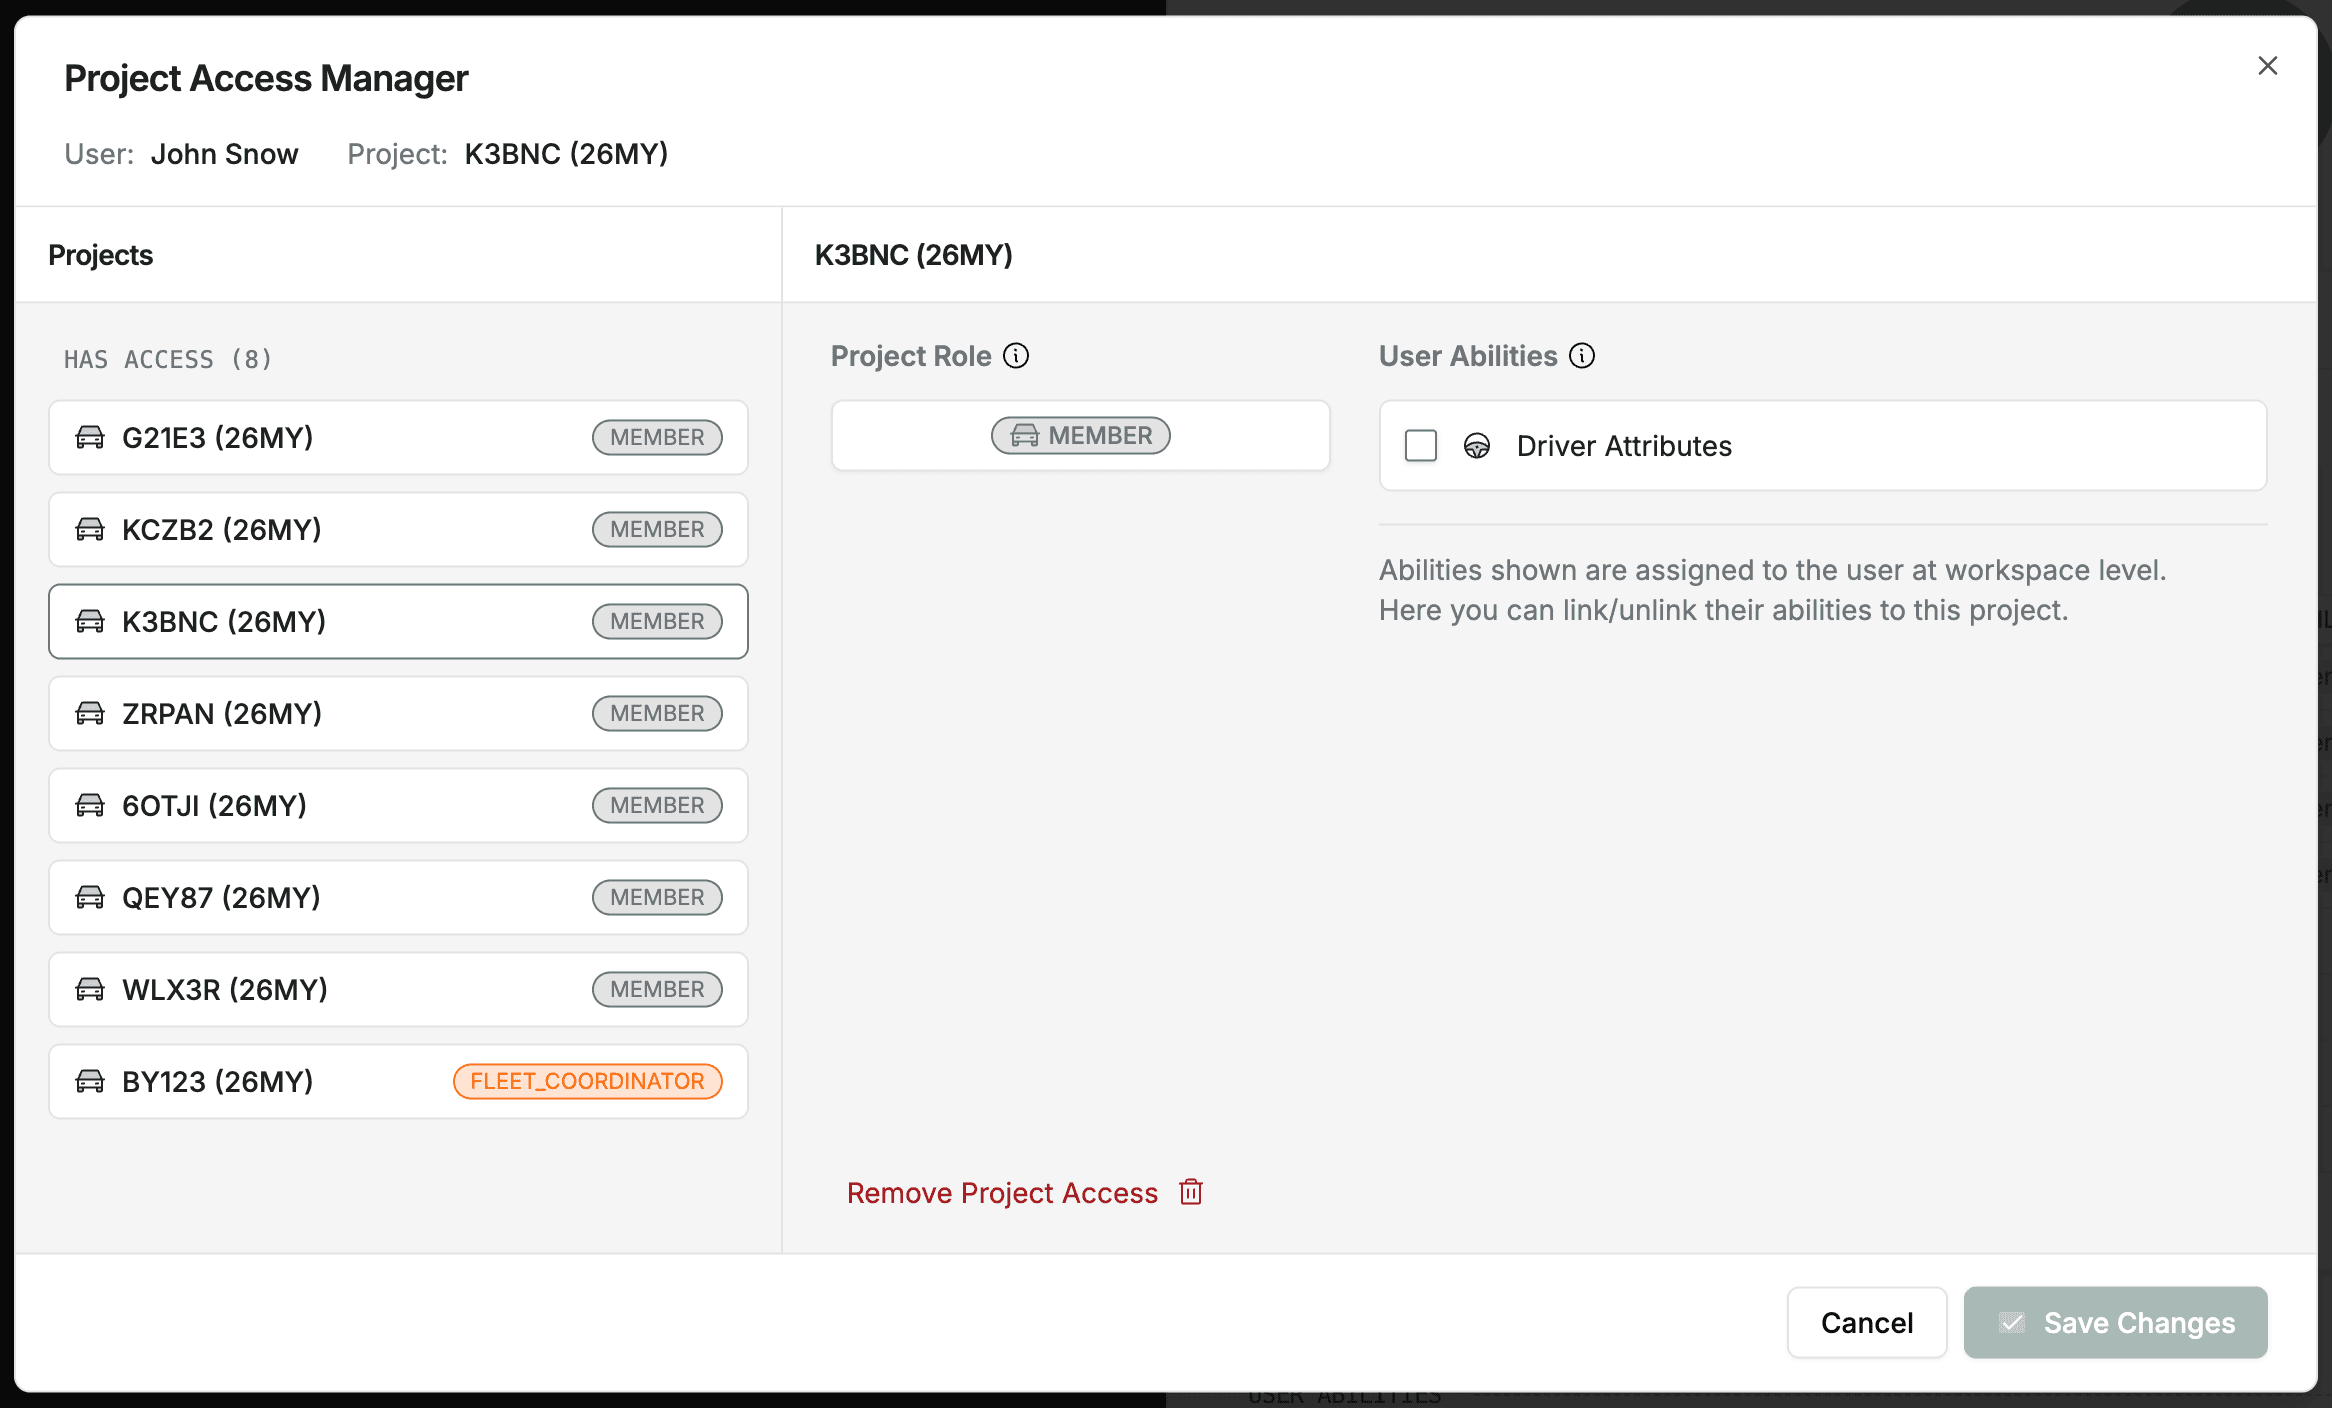
- View and manage their project access.
- Deactivate or reactivate the account.
Removing a User
Deactivate a user from their detail view. Deactivated users lose access to Fleetwise but their historical data (requests, allocations, activity) is preserved.
Data Preservation
Deactivating a user does not delete their data. Requests and allocations they created remain in the system and are attributed to their name.
Tips
- Invite users at the workspace level first, then add them to specific projects with the appropriate role.
- Set up teams early — team colours carry through to the schedule view, making it easier to spot which team each allocation belongs to.
- Review the users list periodically to deactivate accounts for people who have left the organisation.
- Use the project access section on a user's profile to grant or revoke access to specific projects.