Creating a Request
Step-by-step walkthrough of the request creation form — from opening the form to submission.
The request form is split into sections with a step progress indicator on the left. Sections marked with an asterisk are required before you can submit. The more detail you provide, the better the allocation recommendations.
Before You Start
- You need the Request Create permission in the project.
- Know your required dates, usage country, and any specifications or attributes.
- If the request is linked to a work package, have the work package name ready.
Step-by-Step Guide
Open the Request Form
Navigate to Requests in the project sidebar and click + New Request in the top toolbar.
You can also start a request from a work package detail view by clicking Raise Request in the Resources section. This opens the form with the work package already linked.

Request Info
The first section captures the context for your request.
| Field | Required | Description |
|---|---|---|
| Requestor | Auto | Your name — filled automatically and cannot be changed |
| Team | Auto | Your workspace team — filled automatically from your profile |
| Priority | Yes | Standard or Critical. Critical priority requires justification in comments |
| Work Package | No | Link the request to an existing work package in the project |
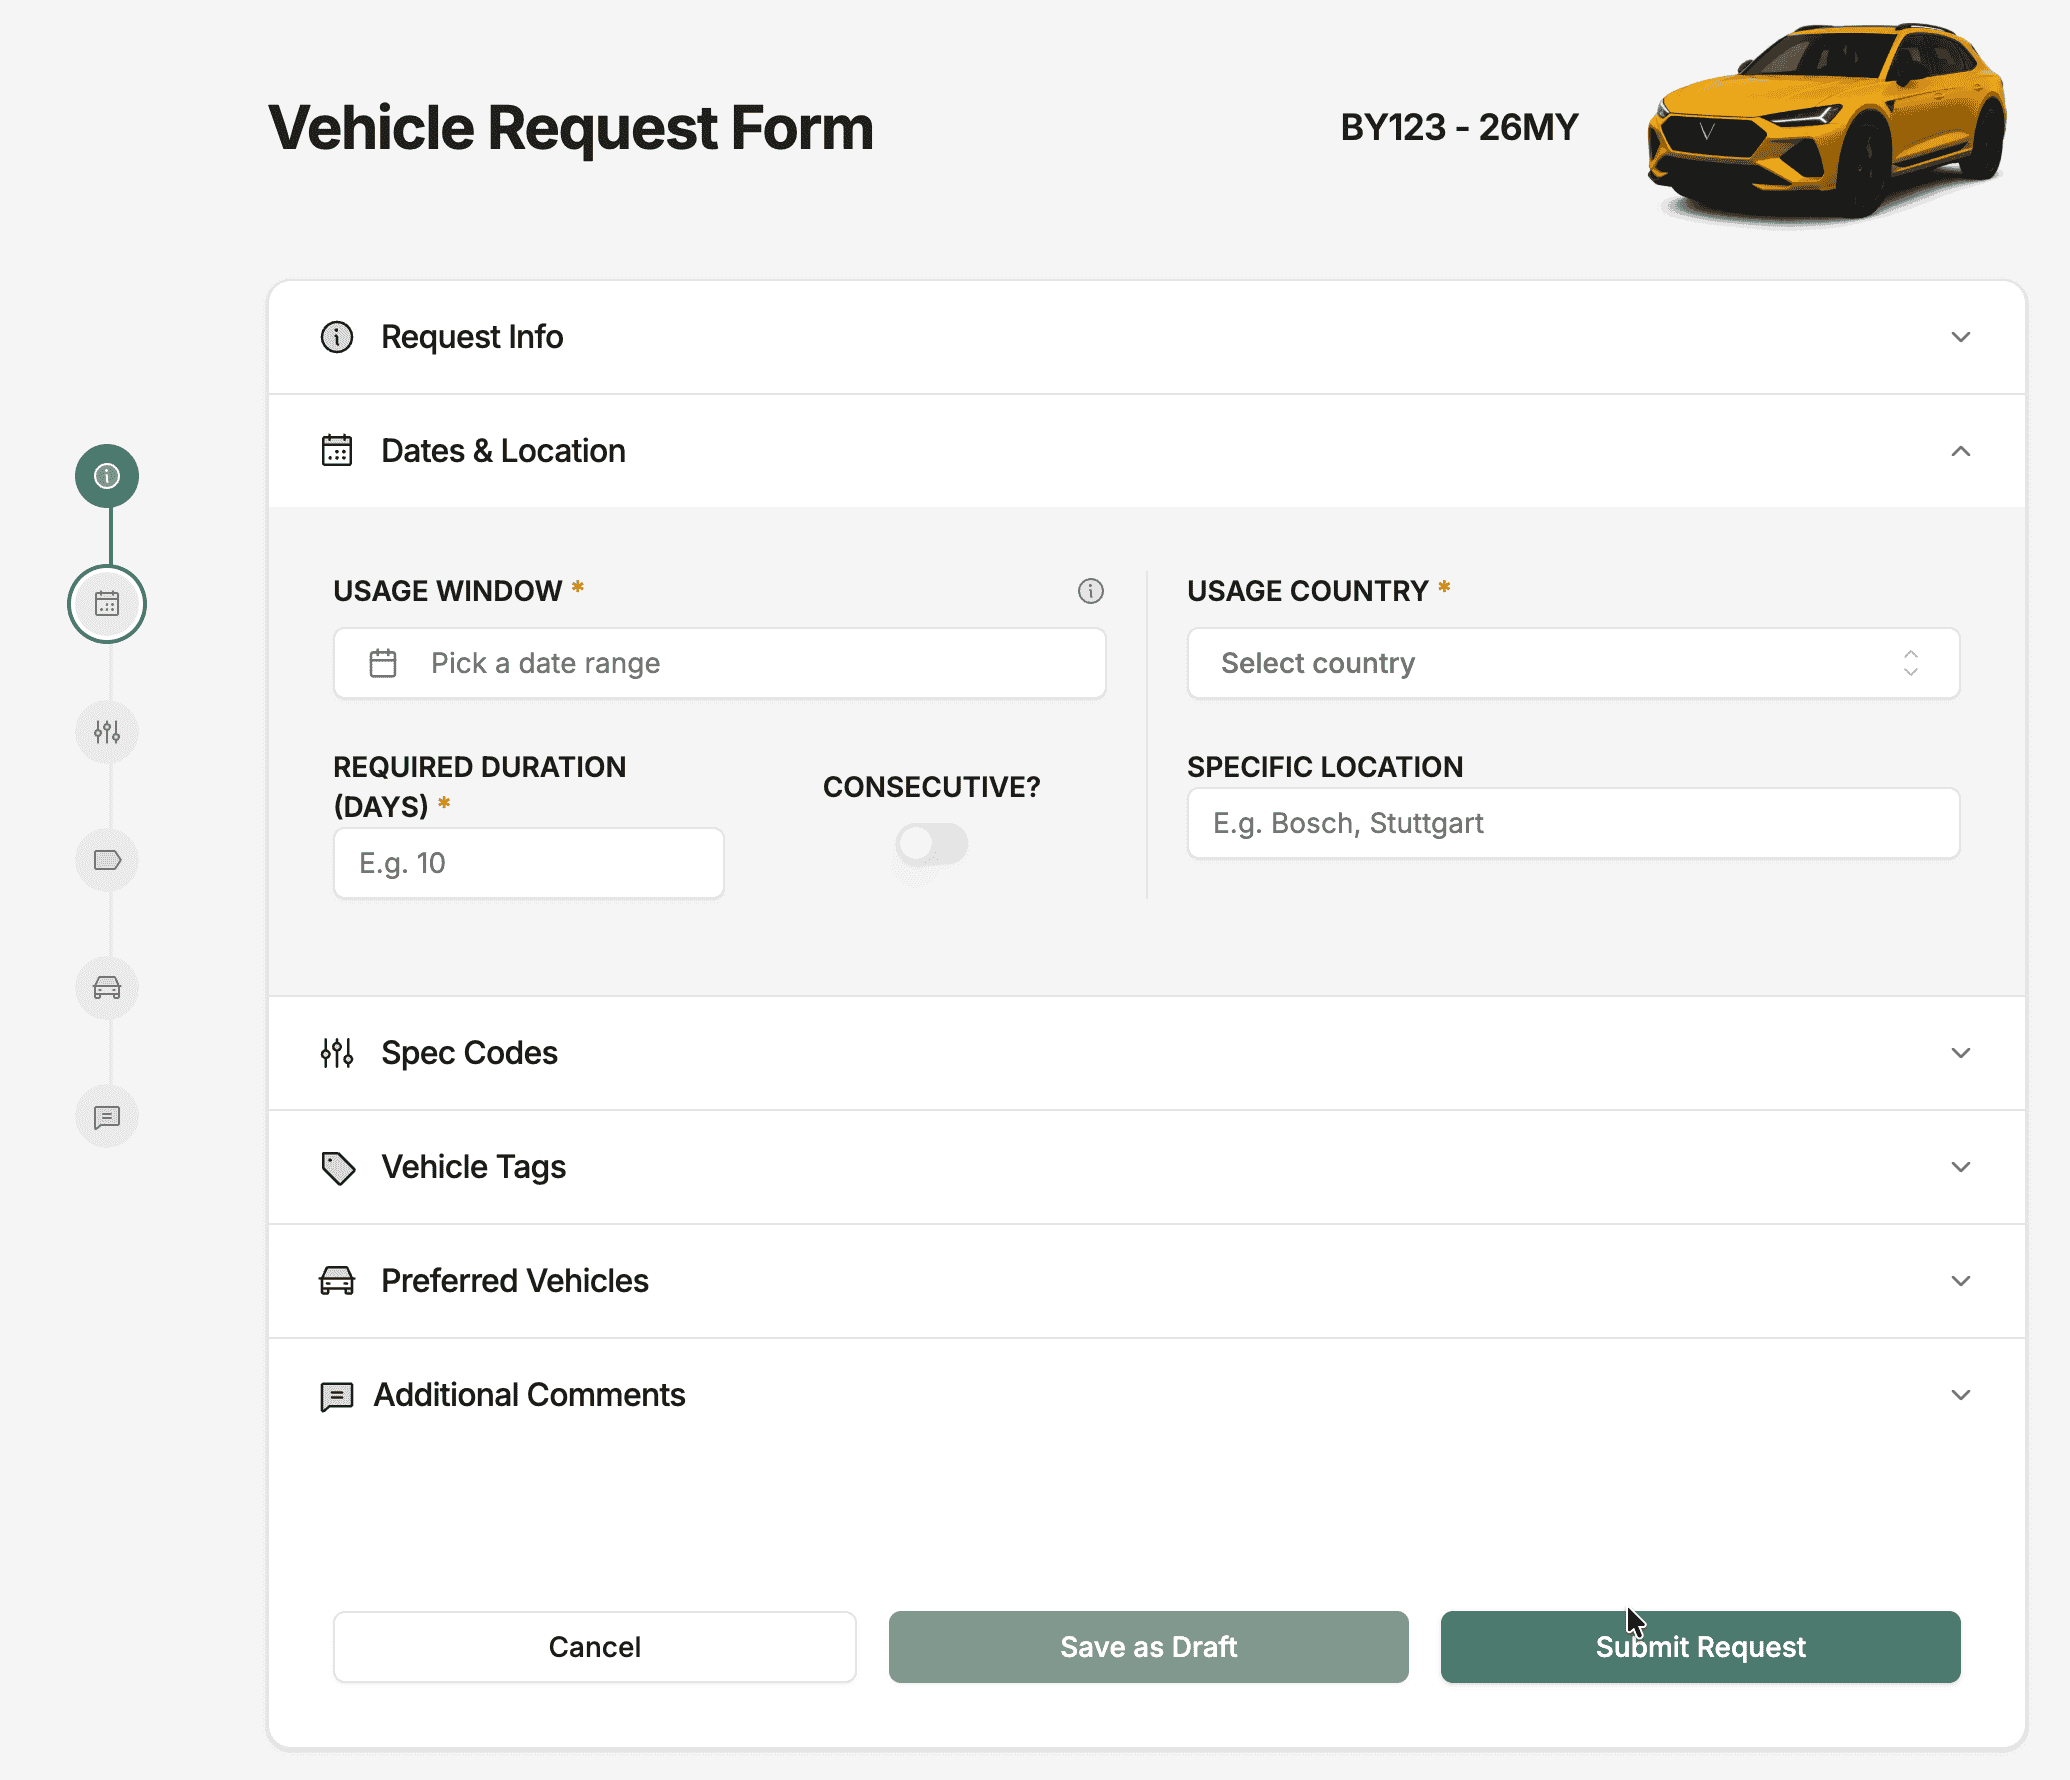
Dates & Location
This section defines when and where you need the vehicle. There are three related date concepts:
| Field | Required | Description |
|---|---|---|
| Usage Window | Yes | The date range during which you are available to receive a vehicle. Select a start and end date using the date picker |
| Required Duration | Yes | The number of days you actually need the vehicle. This can be shorter than the usage window |
| Consecutive Days | No | Toggle on if the required days must be consecutive. Off allows the allocation to be split across the window |
| Usage Country | Yes | The country where the vehicle will be used |
| Specific Location | No | A more precise location, e.g. "Bosch, Stuttgart" |
Usage Window vs Required Duration
The usage window is your availability — the broadest period you could accept a vehicle. The required duration is how long you actually need it. For example, a three-month usage window with a 15-day required duration gives coordinators flexibility to place your allocation wherever a vehicle is free. Wider windows improve match quality.
Spec Codes
Add the spec codes the vehicle should match. For each spec code you can set the importance:
- Essential — the vehicle must have this spec. Vehicles without it are excluded entirely.
- Preferred — the vehicle ideally has this spec. Matching vehicles score higher but non-matching ones are still considered.
Use the spec code selector to search by family or code, then set the importance for each.
Attribute Tags
Add attribute tags the vehicle should be tagged with. The same Essential / Preferred importance applies:
- Essential tags are hard filters.
- Preferred tags improve ranking.
Preferred Vehicles
If you already know which vehicles would work, add them here. Each preferred vehicle can also be marked Essential or Preferred. This is useful when you need a specific vehicle you have used before or one that is already set up for your test.
Comments
Use the comments field to provide any additional context for the Fleet Coordinator — test setup details, special handling notes, or scheduling constraints.
Critical Priority
If you selected Critical priority, a comment is required. The form will not let you submit without providing justification.
Review and Submit
Review all sections using the step indicator. Click Submit to send the request for processing, or Save as Draft to continue editing later.
After Submission
Once submitted:
- The request enters the processing queue (see Request Lifecycle for state details).
- You receive notifications as the status changes.
- You can track progress from Requests → My Requests or from the request detail view.
Editing After Submission
You can still edit a submitted request — open the request detail view and update the fields that need changing. Bear in mind that edits to an in-progress request may affect ongoing review or allocation decisions, so coordinate with your Fleet Coordinator if the request is already being worked on.
Tips for Better Matches
- Be specific with essential requirements but avoid over-constraining — adding too many essentials can eliminate all candidates.
- Separate true must-haves (essential) from nice-to-haves (preferred).
- Use a wider usage window when your dates are flexible — it gives coordinators more room to find a match.
- Add preferred vehicles if you have a known good candidate — it saves the coordinator time.