Project Members
Add, remove, and manage team member roles and permissions within a project.
Project members are the users who can access a specific project. Each member has a role that determines what they can see and do within the project.
Accessing Project Members
Navigate to Settings → Members in the project sidebar.
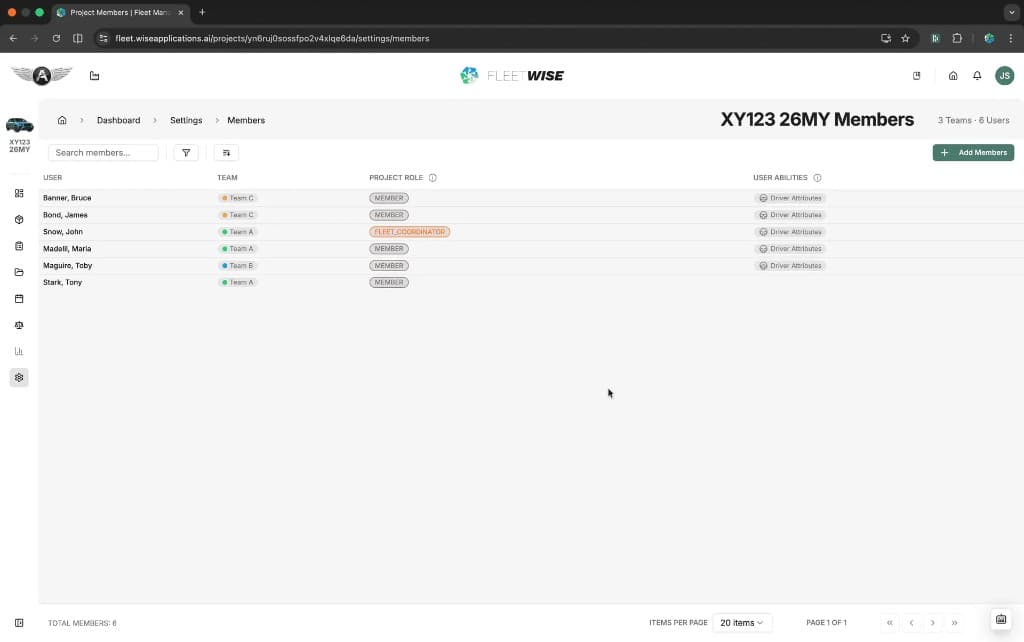
Member List
| Column | Content |
|---|---|
| User | Member name |
| Team | The team the member belongs to |
| Project Role | Member, Fleet Coordinator, Management, or Owner |
| User Abilities | Additional capabilities assigned to the user (e.g. Driver Attributes) |
Adding a Member
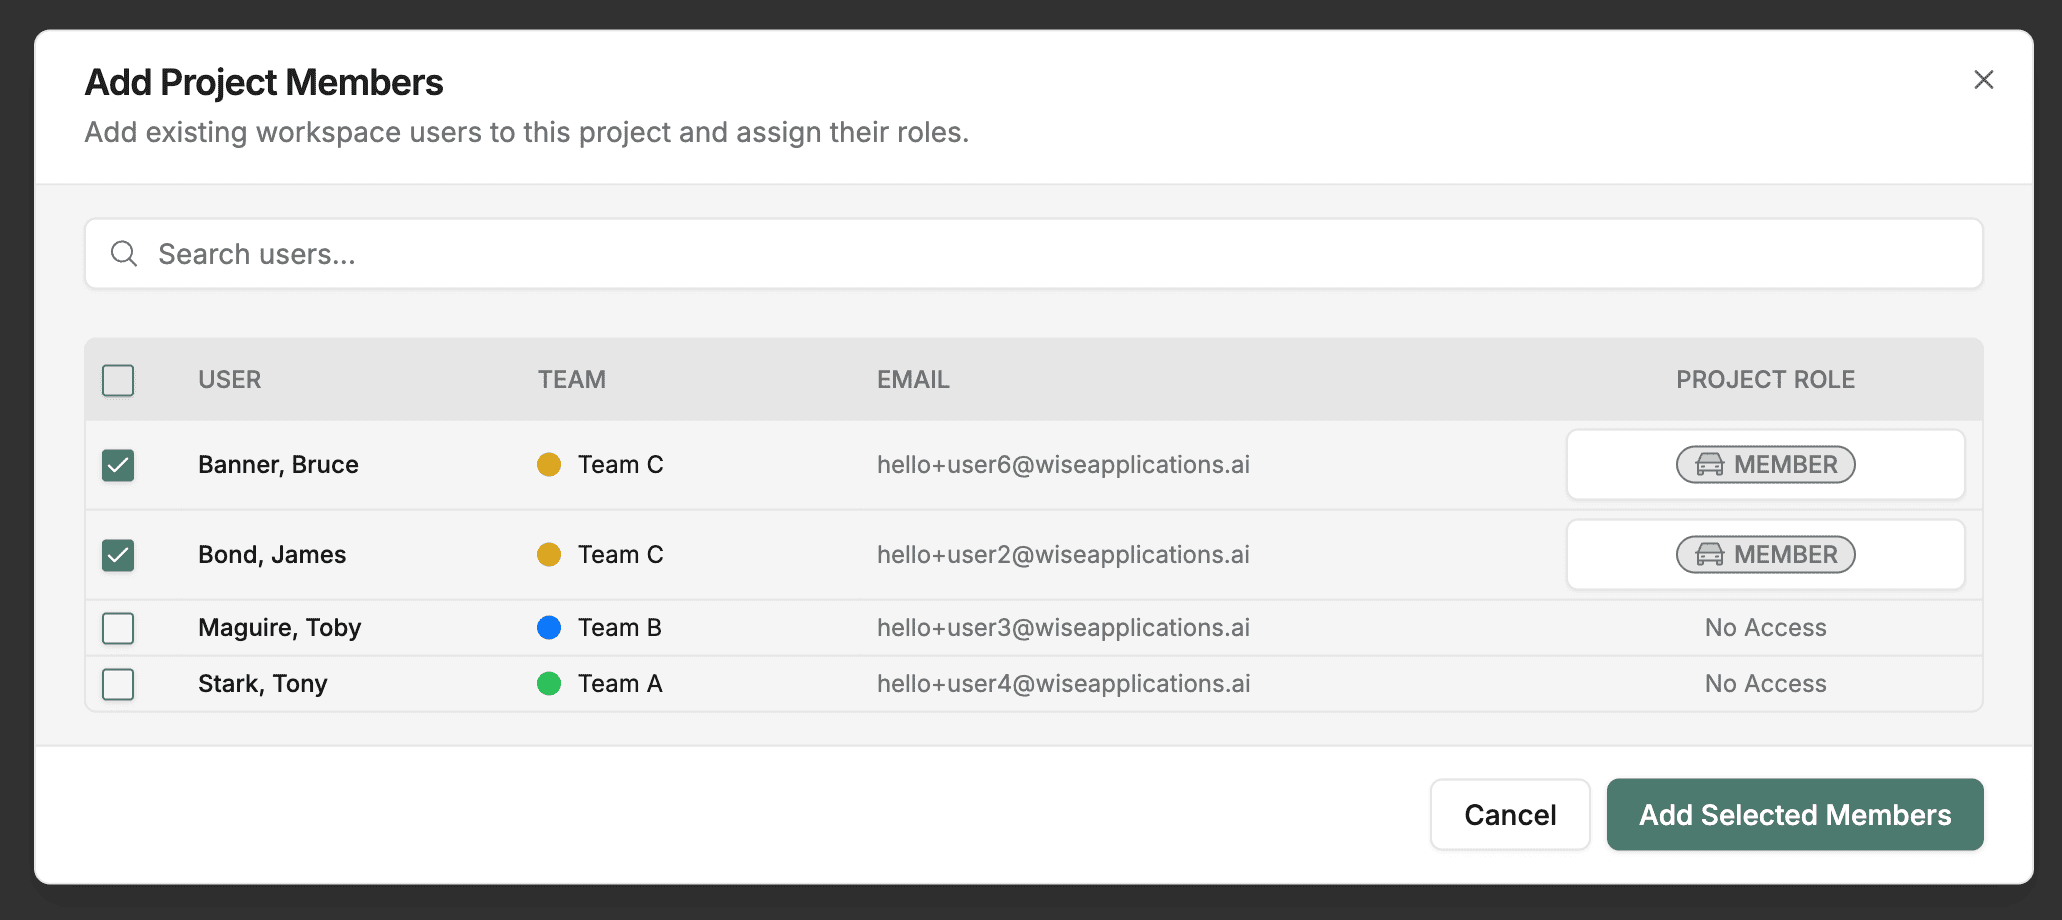
Click Add Members
Click the + Add Members button.
Select a User
Choose from the list of workspace users who are not yet members of this project. Only users who exist at the workspace level can be added.
Assign a Role
Select a project role for the new member: Member, Fleet Coordinator, Management, or Owner.
Confirm
Click Add to grant access. The user can now see the project in their sidebar and access it based on their role.
Workspace Users Only
You can only add users who are already members of the workspace. If someone is missing from the list, ask a workspace Admin to invite them to the workspace first.
Changing a Role
Click a member row to open the detail panel. Change the role dropdown and save. Role changes take effect immediately.
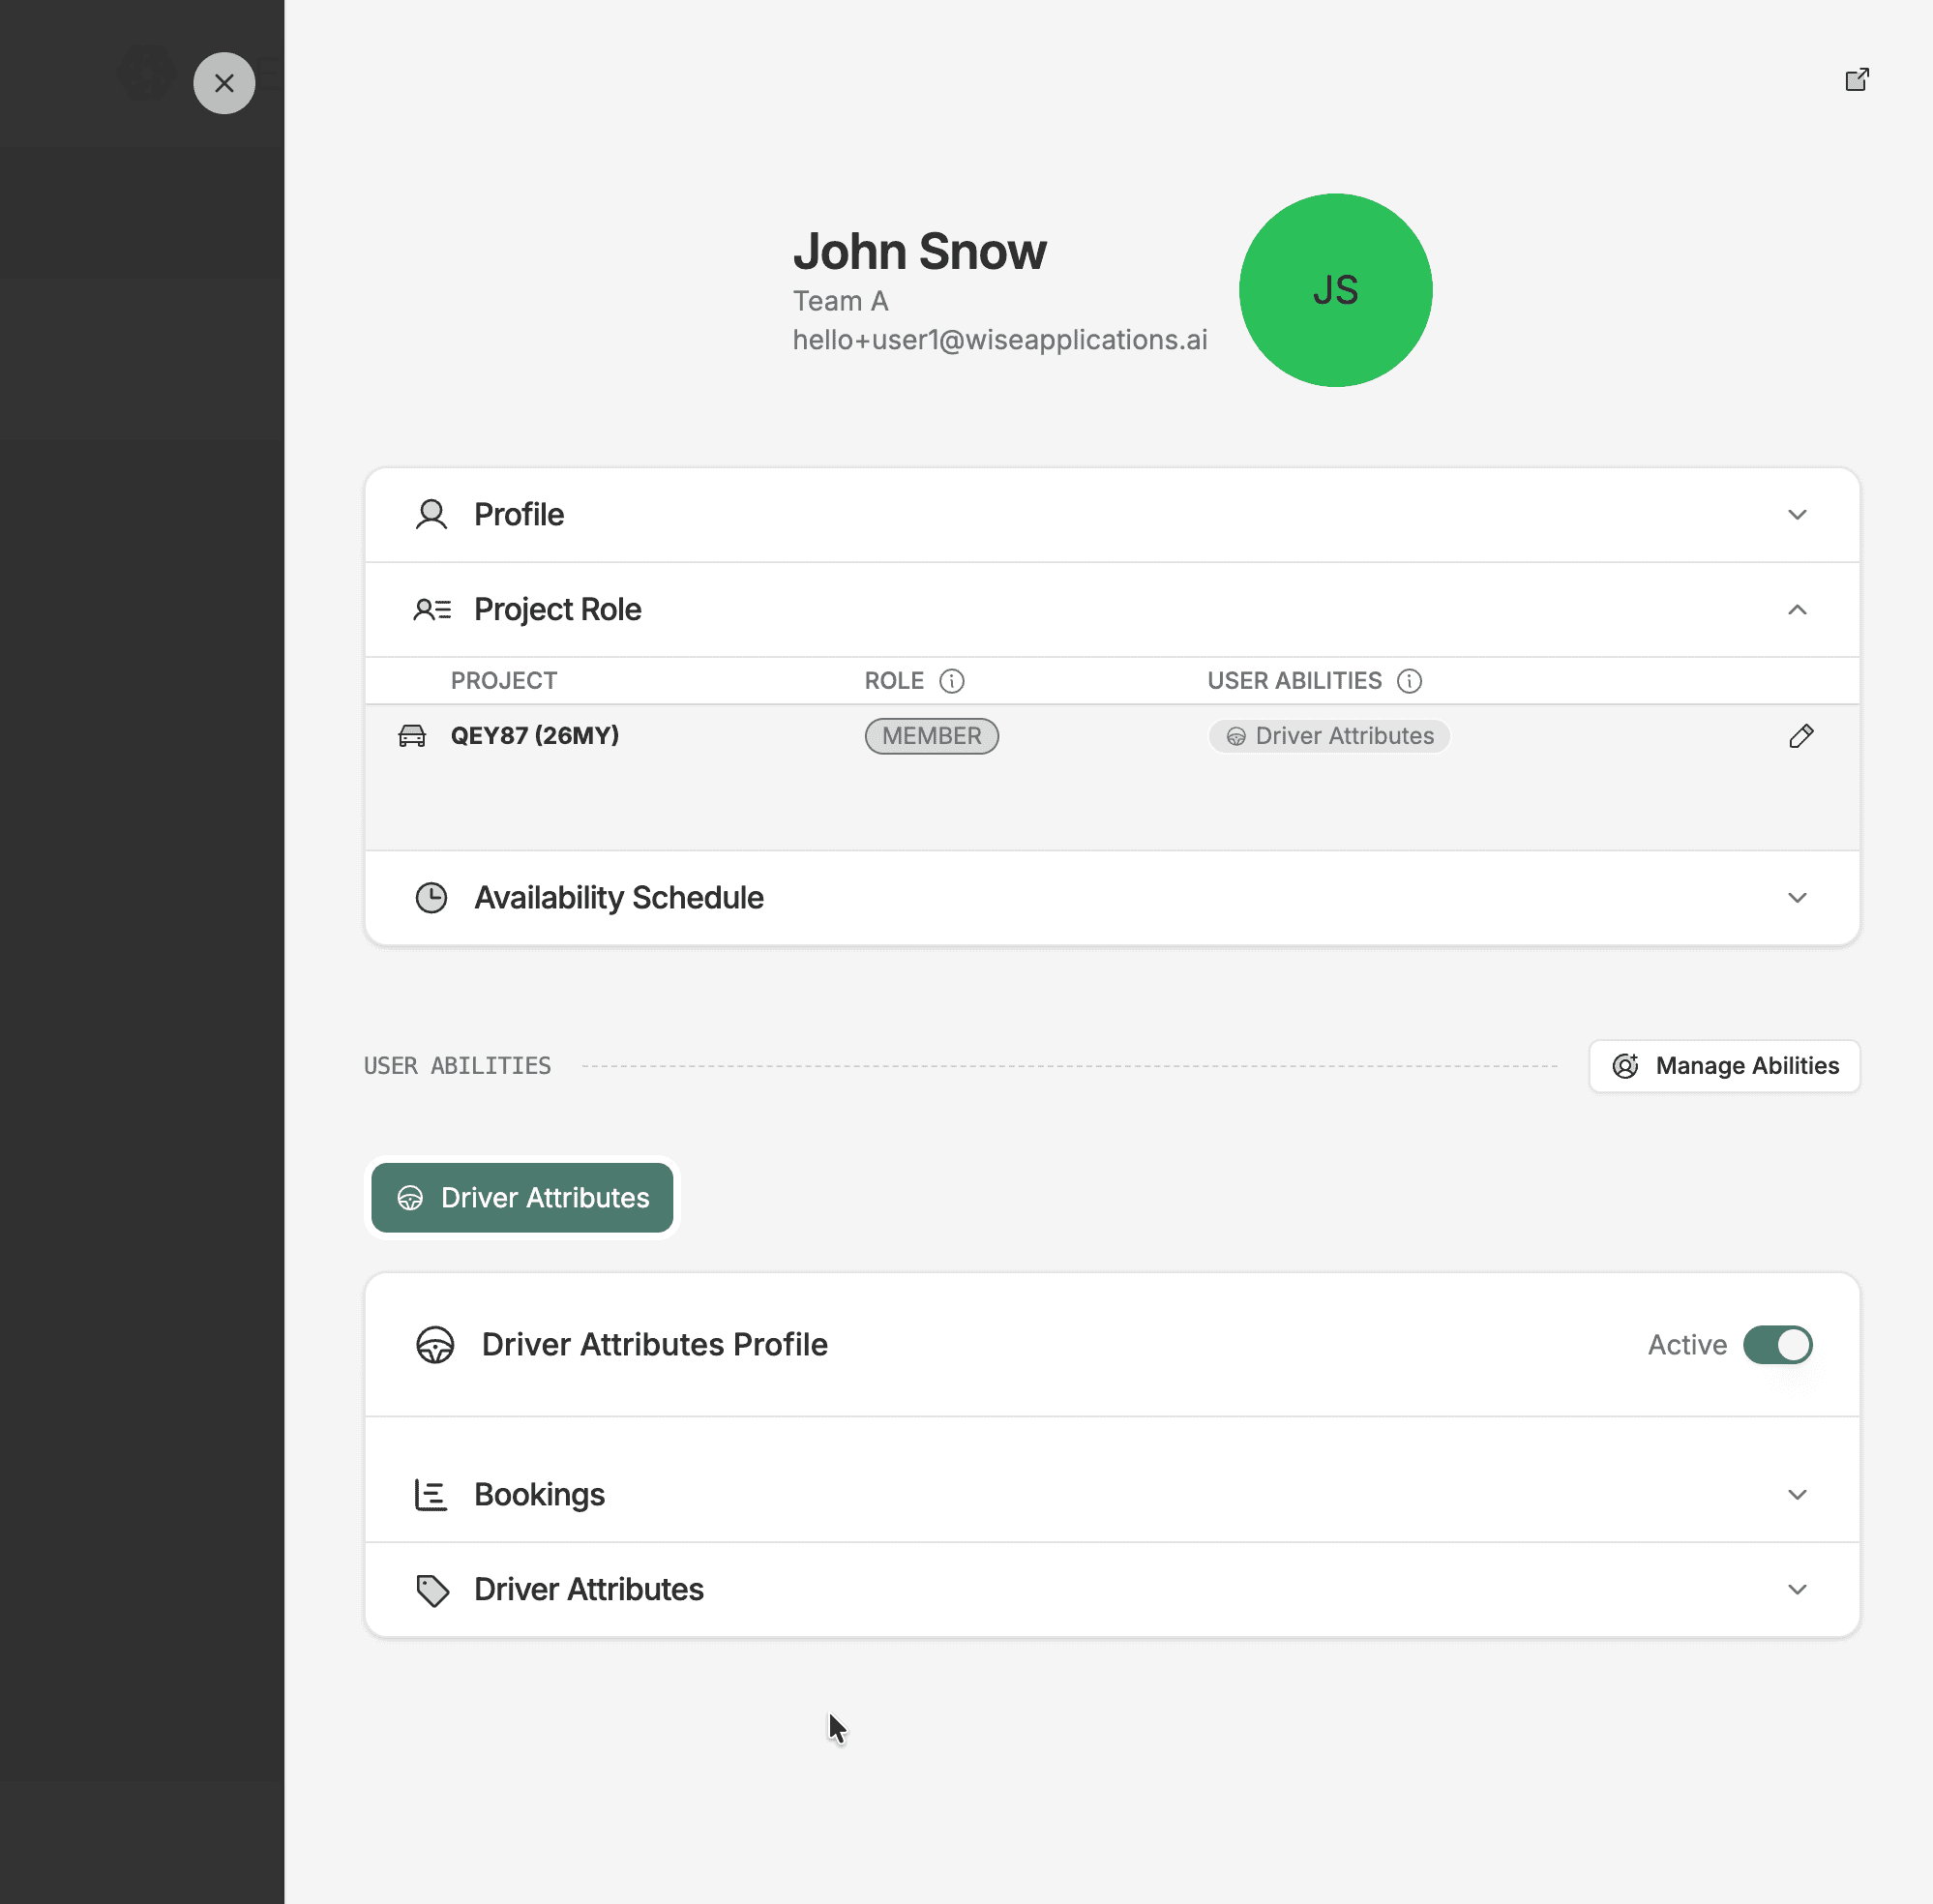
Removing a Member
Remove a member from the detail panel. Removed members lose access to the project but their historical data (requests, allocations) is preserved.
Impact of Removal
Removing a member does not delete or reassign their requests and allocations. The data remains attributed to them.
Tips
- Grant the minimum role needed — start with Member and upgrade as responsibilities grow.
- Review the member list when team composition changes (new joiners, departures, role changes).
- See Roles and Permissions for a detailed breakdown of what each role can do.